|
|
Go Map!!
Go Map!! is an iOS app that lets you create and edit information in OpenStreetMap. Go Map!! supports editing ways and arbitrary tagging. You can download it for free from the App Store. Features
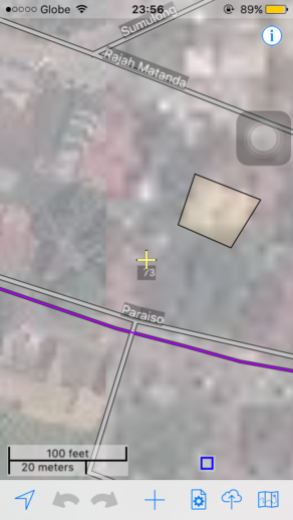
Walk ThroughWhen you first start Go Map!!, it will prompt to use your device’s GPS to determine your location. Say “allow” and it will zoom to your position and download the satellite and OpenStreetMap data near you. If you live in a densely mapped area, it may take a few moments to download, and if you live in a sparsely mapped area, you may need to zoom out a bit to see details. Simply pinch zoom and drag to pan around your immediate neighborhood. Go Map!! automatically downloads additional data as needed as you pan around your location.
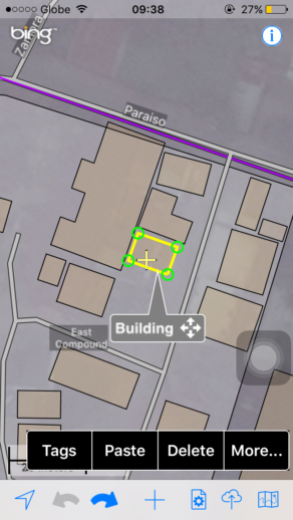
OpenStreetMap uses the term ‘node’ to describe simple points, which typically indicate smaller objects like trees or small shops, while ‘ways’ are larger objects with size, such as highways or buildings. Go Map!! indicates a node with an icon or a small square, while ways are displayed as lines, rectangles or polygons. Adding OSM DataAdding tagsTags are used to describe objects in the OpenStreetMap database, such as indicating that a location contains a shop or restaurant and what its name is. To select an existing object, either a node or a way, simply tap it. To select a building, you must select the outline of the building instead the center. Selected objects are highlighted in yellow and its tag is displayed (gray box) and a configuration button. Press the “Tags” button to view and edit tags.
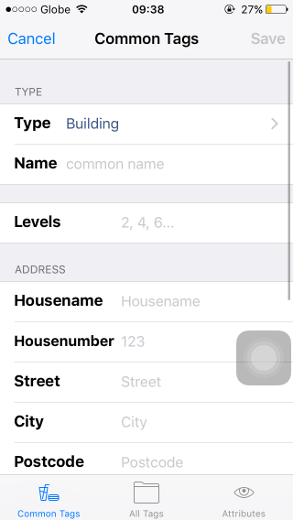
The tag editing screen presented has three tabs of views. The first tab, Common Tags, presents fields for adding common points of interest.
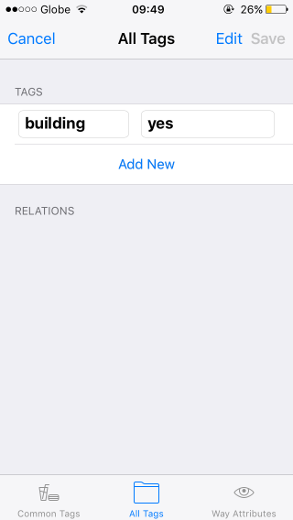
The second tab, All Tags”, allows advanced usersto add arbitrary tags and values.
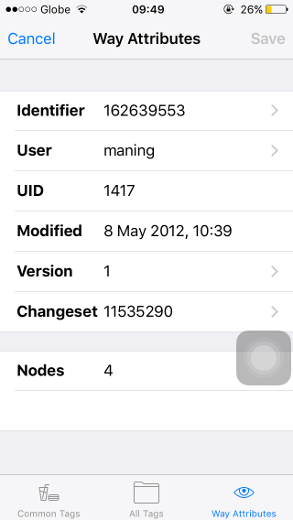
The third tab shows metadata about the object: who created it and when, and additional low-level details. From this tab, you can also drill down to information stored on the OSM server about the user, changeset, object history, and object details.
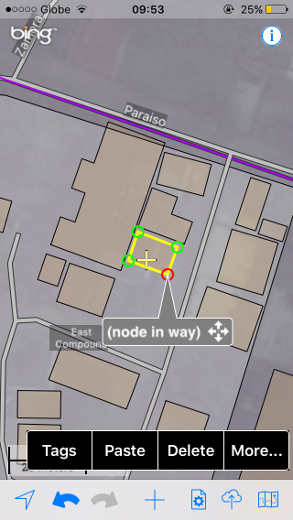
Move a node, a way, or a node in a wayTo move a node or a way, tap to select it, and it will be highlighted in yellow. To select a node that is part of a way, first, select the way, then tap a node in it.
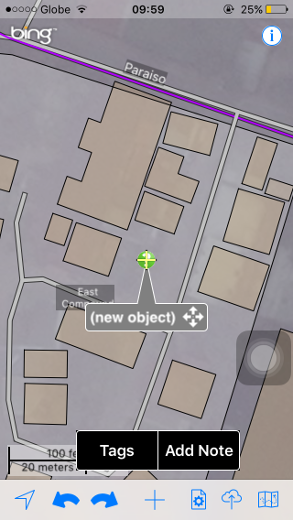
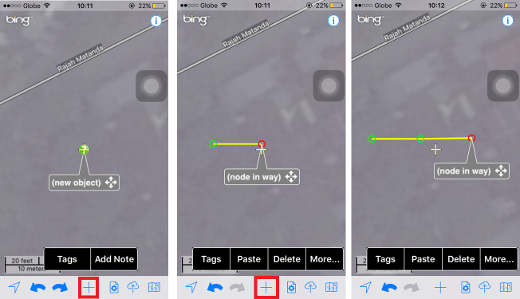
Once selected, drag the title box (gray box) to move it to a new location. Confirm the move if prompted. If you make a mistake, use the Undo button, or simply move it back. Create, move and tag a POITo create a new node or point of interest, tap the “+” button. A pin will drop indicating the position of your new node.
Drag it using the title bar to the correct location, then press the “Tags” button to add tags. If you don’t add any tags, then your new node will be discarded, so if you drop a pin by accident, simply tap elsewhere and it will disappear.
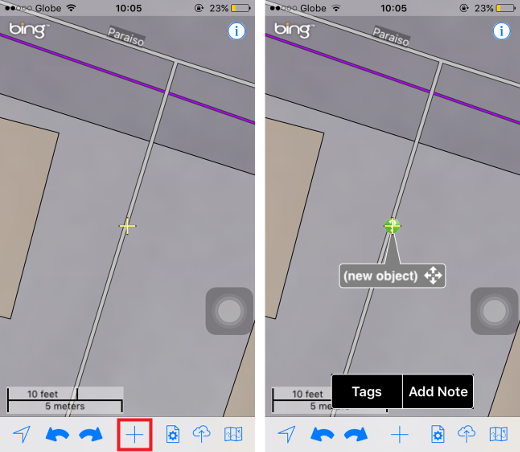
Add a node to a wayIf you wish to add nodes to a way, there are two approaches, depending on whether you are adding the node to the middle of the way or extending it at either end. To add a node to the middle of the way, select the way by tapping close to the position where you want the new node to appear, then press “+”. A node will be added to the selected location.
To append a node to the end of a way, select the way, then select a node at either end, then press “+”. A new node will be added to the start or end of the way.
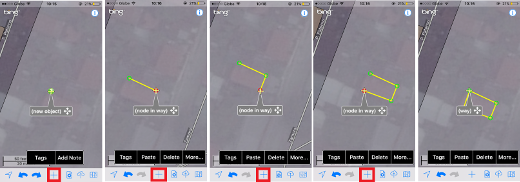
Create a way/areaCreating a new way or area is similar to creating a node, except you press “+” twice. On the first press of “+”, a pin will drop which you can position as desired. Tap “+” again to add the second node connected to the first node. Position the second node and continue pressing “+” to add additional nodes.
To create an area, simply drop a final node and then drag it on the top of the first node. A circle of dots will indicate that it is joining to the existing node. You can also join to existing ways by dragging over them.
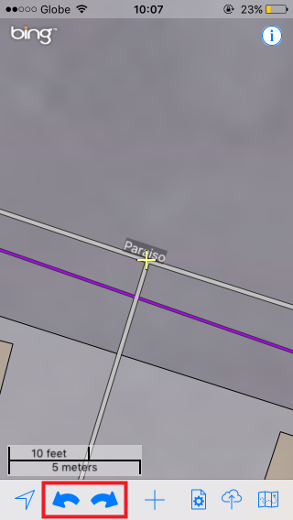
Undo/RedoAny time you make an error, you can use the undo button to revert your changes. All actions including tag changes can be undone, or redone, even if you exit the app and restart later. After uploading to the server all undo actions are discarded. You cannot undo after uploading.
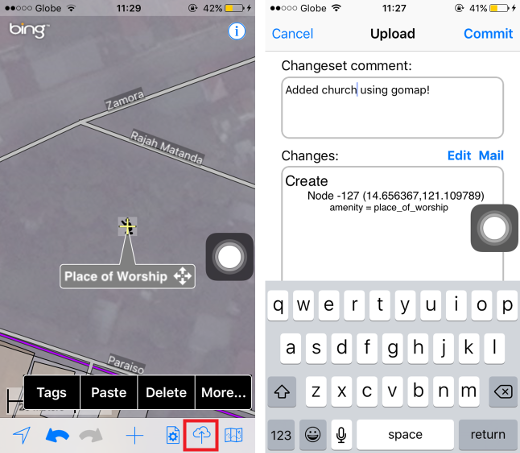
Upload changesWhen you are finished making your changes to the map, you can submit your changes to the OpenStreetMap server by pressing the upload (cloud) button.
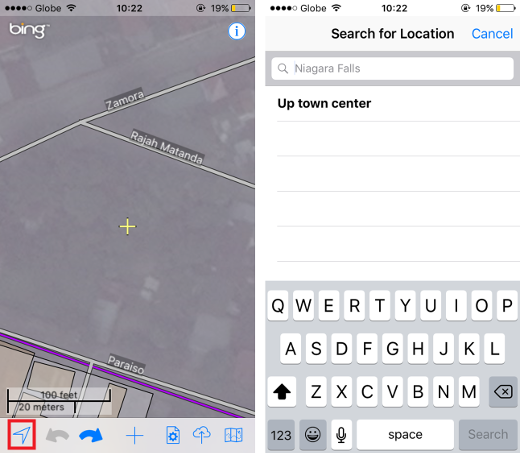
If the change is uploaded successfully, you will simply be returned to the map screen. After uploading, you cannot undo to a previous state; all changes are final. Searching for PlacesPress the GPS button to zoom to and track your current location. Press it again to turn off GPS. Press and hold the GPS button to perform a nomatim search of places or landmarks you wish to zoom in.
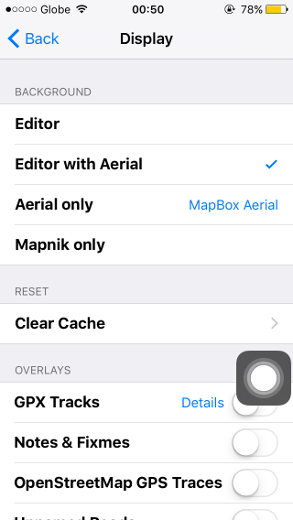
Setting the Background DisplayLike using the OSM editors such as iD or JOSM, Go Map!! allows us to use different backgrounds that can guide us in editing data. You can change the background to show just the editing layer while you may select “Editor with Aerial” if you want to use aerial imagery as the background for editing.
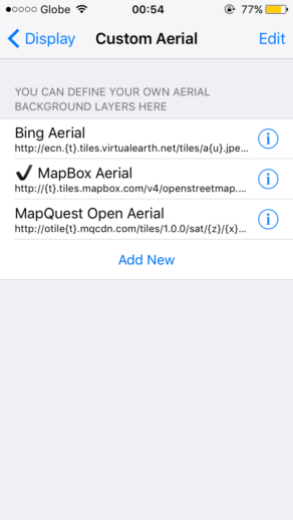
You also have the option to select what aerial imagery to use while editing. By selecting the text beside “Aerial only”, choose which imagery you wish to use.
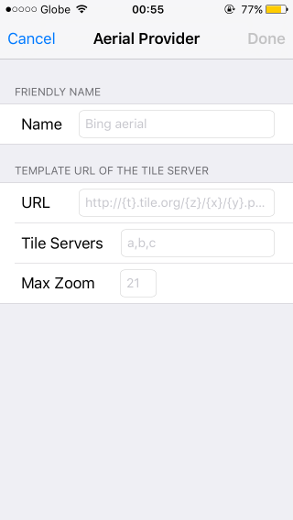
You may also customize with your own imagery by selecting “Add New” and entering the name and the URL of the imagery on the URL text box. You need to define the tile servers and max zoom for this imagery.
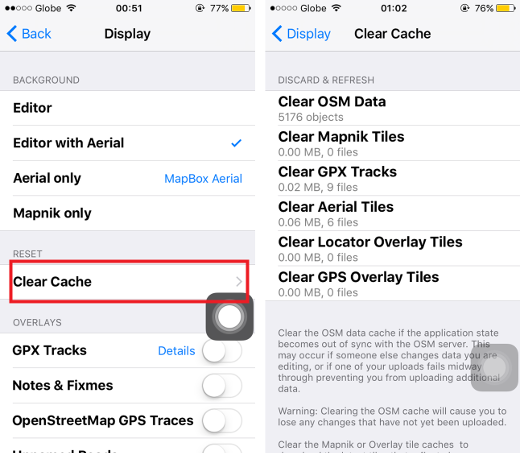
Select “Clear Cache” if you want to clear the OSM data cache. It can be used if you have downloaded a bit too much data for your iOS device to handle and things are becoming sluggish. Clearing the OSM data cache is helpful especially if the application state becomes out of sync with the OSM server. This may occur if someone else changes data you are editing, or if one of your uploads fails midway through preventing from uploading additional data.
Clear the Mapnik or Overlay tile caches to download the latest tiles that reflect changes you’ve previously submitted. Your changes may take up to 24 hours to be processed.
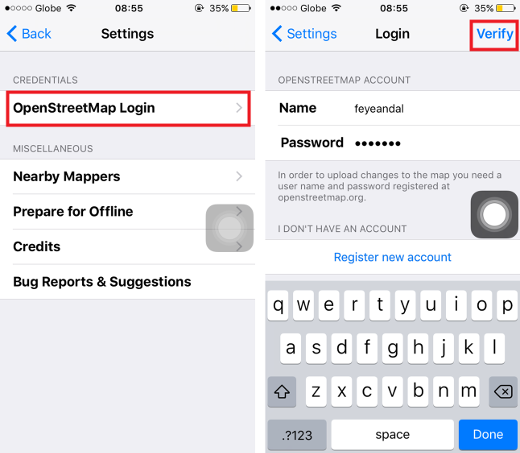
You may also overlay different information such as GPX Tracks, Notes & Fixmes, OpenStreetMap GPS Traces, and Unnamed Roads. Plus, you can enable rotation of the app and enable 3-D effects of the OSM data. Setting the Settings and miscellaneousGo Map!! requires you to be a registered user on openstreetmap.org in order to upload changes you make to the map. You are required to provide tour openstreetmap.org name and password to the application before uploading data. Under the Settings icon, select OpenStreetMap Login and type your OSM username and password. If you don’t have an OSM account, kindly select “Register new account” and follow the instructions. Select “Verify” once you’re done.
You can also find other mappers nearby by selecting “Nearby Mappers”. This shows everyone that has edited the area in your current view. Zoom in to see fewer people or zoom out to see more.
“Prepare fo Offline” option downloads Bing and/or Mapnik tiles for offline use if you expect to be mapping an area without cellular connectivity. Alternatively you can simply scroll around the area you plan to be visiting: all Bing, Mapnik and OpenStreetMap data is cached and will be available even if you have no connectivity. Once you have an access to the internet, simply upload as usual. When displaying Bing aerial imagery, click the Bing logo to retrieve Bing copyright and data provider information.
Was this chapter helpful?
Let us know and help us improve the guides!
|