GPS Essentials
Reviewed 2015-05-24
Installation of GPS Essentials
- Tap the “Google Play Store” app icon on your Android device’s home screen to open the Android Market.
- Tap the “Search” icon in the upper right corner.
- Use the search bar at the top to search for “GPS Essentials”.
-
Tap the GPS Essentials icon and select “Install”. The icon looks like this:

If you don’t have access to Google Play or if you want to download versions other than the stable release such as older versions or the latest beta, you can download GPS Essentials from http://www.images.com.
-
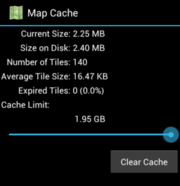
Open GPS Essentials. Go to Settings and select Map Cache. Move the cache limit to maximum.
-
Find a strong network connection. From main screen, select ‘Portable Maps’. Every map you view in portable map mode automatically saves to the Android’s memory. Save maps you will need offline in as much detail as possible, and slowly zoom in on each waypoint.
-
Disconnect from the network and view maps in portable map mode. If some maps lack detail, re-connect to a network and slowly zoom in on the map location you need.
GPS feature on Android phone
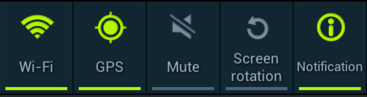
Before using the GPS Essentials Application, make sure the GPS in your Android phone is enabled.
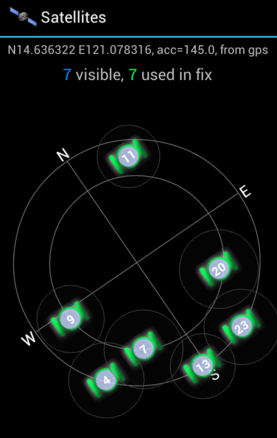
Acquiring Satellites
Before a GPS receiver emits a location (also called a GPS fix), it must receive signals from at least four satellites. The lower the satellite is above the horizon, the longer its signals travel through the atmosphere so satellites high above the horizon usually have better signals.
To check the satellites in your area:
-
From the main menu, select Satellites.
-
If there are at least four satellites used in the fix, then you may start using the GPS Essentials features.
Creating Tracks
-
From the main menu, select Tracks.
-
Tap on Start from the toolbar. It will create a new track and start recording. Wait some seconds until GPS fix is available.

-
Select Pause button to pause recording. If you want to continue recording, press it again.
Creating Waypoints
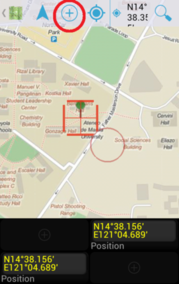
Using Portable Maps
-
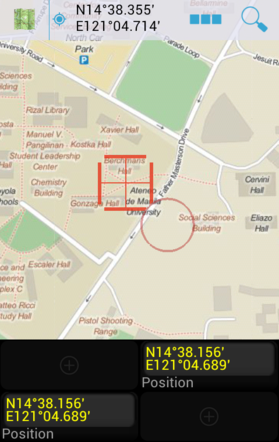
From the main menu, select Portable Maps.
-
Tap and hold on the map to create a new cursor.
-
Drag the cursor onto the location where you want the new waypoint.
-
Tap on Actions to show the actions pane. The Actions icon looks like this:

-
Select the Add Tool to create the waypoint.
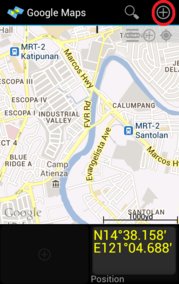
Using Google Maps
-
From the main menu, select Google Maps.
-
Go to the location where you want to add your waypoint.
-
Select the Add Tool to create the waypoint. Tap on the location on the map to create a Waypoint there. If you want to create a waypoint at your current location, tap the Add Waypoint button again.
-
Repeat steps b and c until you are finished recording your desired waypoints.
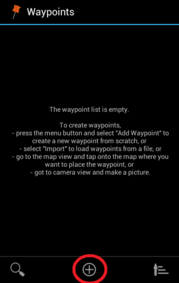
Using Waypoints page
-
From the main menu, select Waypoints.
-
Select the Add tool to create the waypoint.
-
It will start recording your 1st waypoint. You may change the attributes of the waypoint and then press Back to get back to the list.
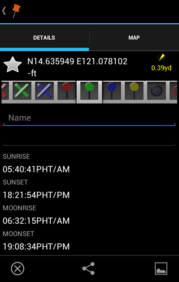
-
When you select the Map pane, you will see where your waypoint is located on the map.
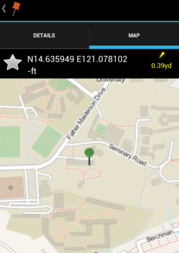
-
Select Close icon to save your waypoint. The Close icon looks like this:

Geotagging Photos
-
From the main menu, select Camera.
-
Take a picture of your desired area for geotagging.
-
The photo you took will serve as a waypoint and automatically be saved on the Portable Maps and Google Maps page.
-
The data (picture location and the photo file name) will also be logged on the Waypoints page. You may also choose which icon to be used for a particular image. The icon will be shown on the Portable Maps and Google Maps page as well.
Saved Photos
All your pictures are in the folder com.mictale.images on your SD card. You can delete pictures from this folder and you can even add new ones. GPS Essentials scans this folder regularly to see what’s new.
Exporting/Saving Waypoints
-
From the main menu, select Waypoints. It will show you the list of waypoints you recorded.
-
To export all the waypoints, select Export from the Options button. If you want to export a single waypoint, select the desired waypoint, click the Options button and select Export.
-
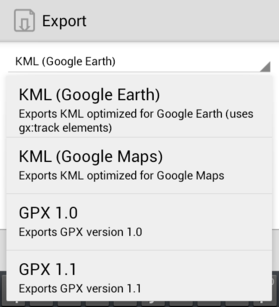
The dropdown box will let you select what type of file you want your data to be exported. For now, click KML (Google Earth).
-
Select the SD card icon to manually select your desired location of the file.

-
Click this icon to Save.

Exporting/Saving Tracks
-
From the main menu, select Tracks. It shows the data from the current track you recorded.
-
Select Export from the Options button to write the contents of the current track to a file.
-
If you want to export the previous track you recorded, select Tracks icon and choose the desired track. Click the Options button and select Export. The Tracks icon looks like this:

-
The dropdown box will let you select what type of file you want your data to be exported. For now, click KML (Google Earth).
![Export1][]
-
Select the SD card icon to manually select your desired location of the file.
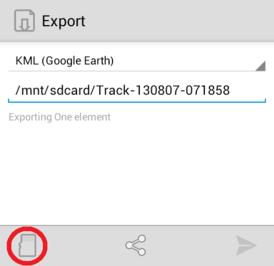
-
Click this icon to Save.
