|
|
OruxMaps
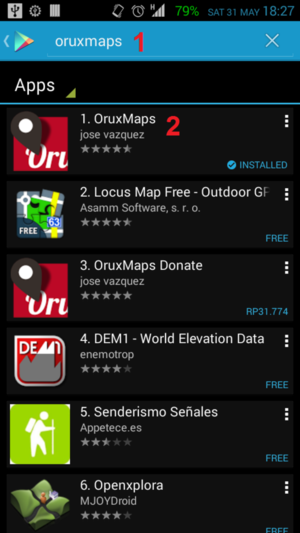
In this section, we will learn how to set up OruxMaps, how to create waypoints, how to see a tracklog, and how to export a tracklog for use in JOSM. Install OruxMapsInstall the app from Google Play Store by searching for OruxMaps, OruxMaps should be among the top search results listed.
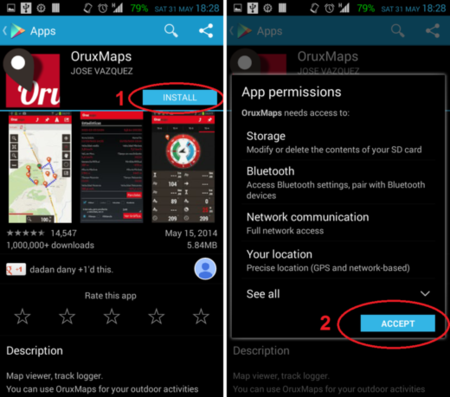
Click on Install button and press Accept after App permissions appears.
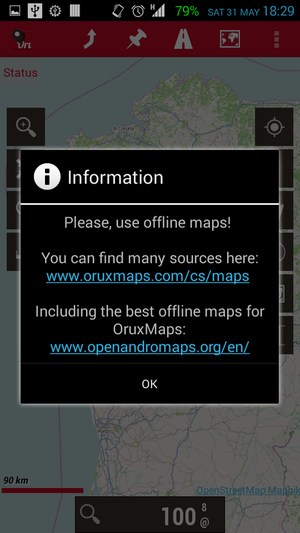
Congratulations! You now have OruxMaps installed in your device! Using OruxMapsThe first time you run the application, you will see a notification like this:
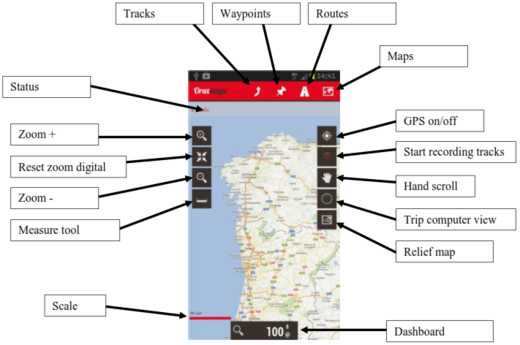
In OruxMaps, you can choose whether you want to use online maps or offline maps. It’s better to use offline maps since you can use it even without an Internet connection. OruxMaps will suggest two sources for downloading offline maps. If you already have your offline maps, you can also put in here too! At first it can be a little bit confusing because there are so many buttons in there. But don’t worry, you will see the explanation for each buttons below:
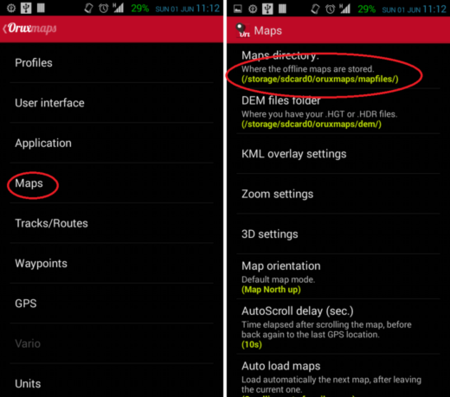
Source: OruxMaps Manual English Version You can change your background map under Maps > Switch Maps. After that you get to options - you want to use your Online Map or you want to use Offline Maps. OruxMaps provide a lot of Online Maps source that can you choose but of course it will cost money from the data plan on your device. If you want to know where you can put your offline maps, you can go to Setting >Maps. In the map directory option you can see where the OruxMaps put your offline maps. By the default, it’s in OruxMaps/Mapfiles folder in your internal storage.
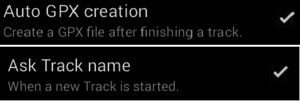
Start TrackingBefore you start tracking let’s review some settings under track/routes setting. The first setting is Auto GPX Creation. If you check this setting, OruxMap will help you to create .gpx file immediately after finishing a track (using Stop Tracking feature). So, after finishing a track, you can go to OruxMaps/Tracklogs in your internal storage to get your .gpx files without needing to export your track log first in track/routes management. The second setting is Ask Track Name. It’s very useful to define your track name before you start tracking so that you exactly know the specific name of your tracks.
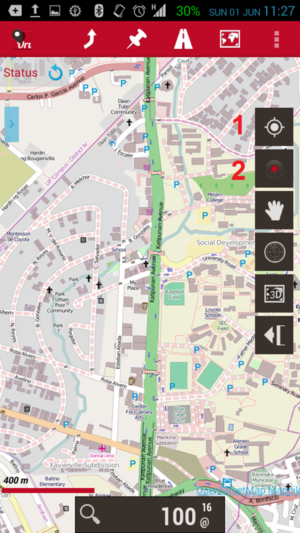
To start tracking, one thing to remember is that we must set GPS Features in your device on. Any features in OruxMaps like Start GPS and Start Rec will not start unless you activate the GPS Features. OruxMaps will show notification if your GPS still disabled, and after that you will directly go to Location Setting in your device. After you turn on Location feature in your device, you can know your location by using Start GPS (1) feature in the right panel. After your location is already acquired, you can start Tracking by using Start Rec. (2) in the right Panel.
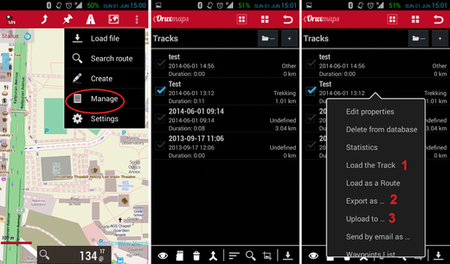
To stop tracking you only need to press the same button (2) in the right panel. After you stop tracking OruxMap will store your tracklog in an internal database. You can access the tracklog by accessing Routes panel in top page, select Manage.You will find all of your tracklog here and you can see the route by press the tracklog that you want to see and select Load the Track (1). If you don’t use Auto GPX creation feature you can export your tracklog in various format (GPX, KML, KMZ) by select your tracklog and Export as (2).
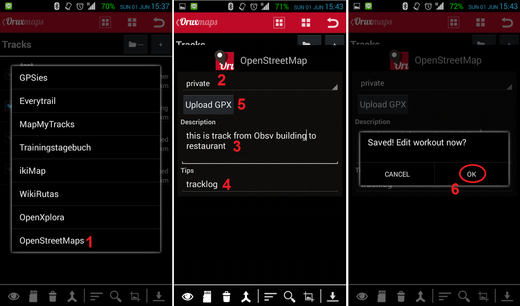
If you already have an OpenStreetMap account, you can upload your track directly using OruxMaps. Before you upload your tracklog you need to put your username and password by going to Setting > Integration > OpenStreetMap. After that enter your username and password. You can upload your tracklog by using Upload to (3) in track/routes management. Some windows will pop up and you need to select OpenStreetMaps (1) and after that you choose your Tracklog type (2), put your Description (3) and also the Tag (4). After all the information already filled up press Upload GPX (5). The notification will pop up and you can directly see your GPS traces on the OpenStreetMap website by selecting OK (6).
Adding Waypoint
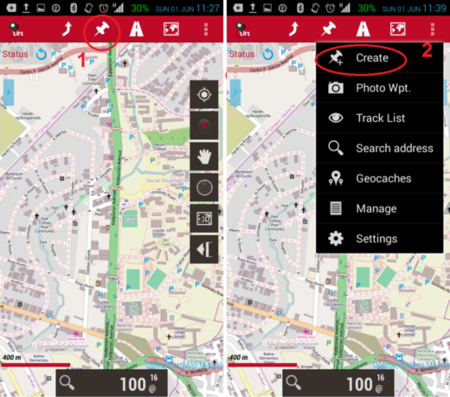
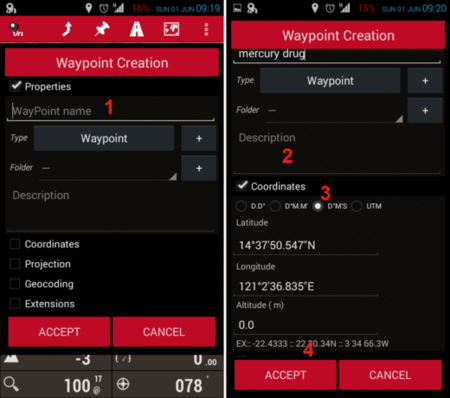
If you want to add waypoint, you need to go to Waypoint symbol (1) at the top of the page and go to Create (2). It will bring you to waypoint creation page and fill your waypoint name. You can add extra information, for example a description of your waypoint and coordinates of your waypoint by checking the Coordinates checklist. Press Accept to save your waypoint.
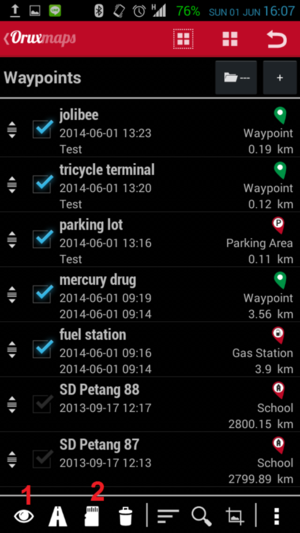
If you want to see all of your waypoints, you can go to Waypoint >Manage. From this page you can change the properties, delete and export the waypoint. To see all of your waypoints in map, select the waypoints and go to show in map (1) and if you want to export your waypoints press Export (2). All of your exported waypoints will be stored in internal storage (by the default it stored in oruxmaps/geocaches).
SummaryCongratulations! You already know how to use OruxMaps for field surveys. It may be hard on your first time but if you continue using this you will be familiar with this application.
Was this chapter helpful?
Let us know and help us improve the guides!
|