|
|
JOSM - Creating Custom Presets
In the previous chapter we looked at how custom presets menus can be added into JOSM. In this chapter we will cover how to create your own custom presets files. WARNING! This is an advanced topic… consider yourself warned! Introduction to XMLIn order to create our own Presets menu, we first need to understand a language called XML. If you’re already familiar with XML feel free to jump the next section. XML, which stands for “Extensible Mark-up Language”, is a computer language similar to HTML. The key difference is that XML is designed to carry data, not display it. Many applications on the internet use XML to transmit data, including OpenStreetMap. XML uses elements, and each element can contain child elements inside it. For example, let’s imagine that we want to create an XML file that contains data about a restaurant menu. We must create a root element to contain all the data about our menu. Our root element will have an opening and a closing tag, like this: Information is contained inside an element, and within each element there can be more elements. In this example we have placed two <item> elements within our <menu> element to describe two different items that are contained in the menu. Each item contains two more elements in them, <cost> and <description>. Notice also how we have written name=”Hamburger” inside the opening <item> tag. This is called an attribute, and adds information about the element. XML Terminology
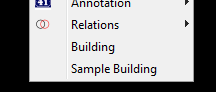
Using XML to hold and transmit data is great because it is easy to understand for computers. JOSM Presets FilesLet’s add a sample presets file into JOSM and analyze how it works.
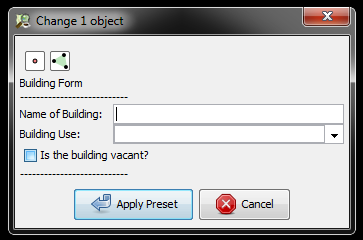
Notice that the form which appears has three fields in it, and each accepts a different type of input. The first field, building name, accepts a text string as input. The second, building use, has a dropdown box. The final field is a check box, meaning that it can only have one of two values, on or off.
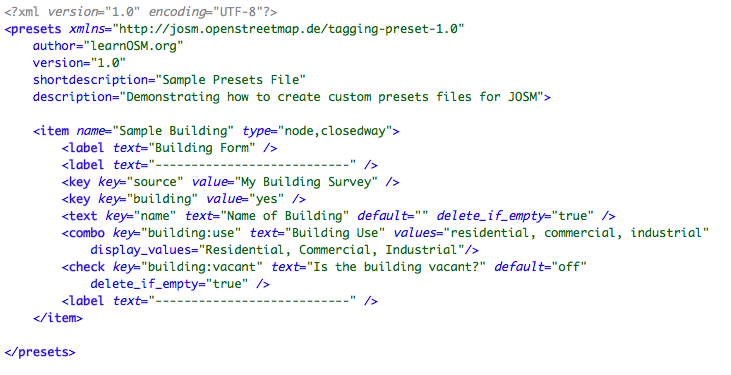
Now let’s look at the XML file which defines this Preset form.
For now, let’s ignore the first six lines and the final line, and focus on everything between the <item> tags. The first line looks like this: This is the opening tag of an item which is added to the menu. It has two attributes, name and type. The name defines how this will appear on the Presets menu. The type limits this preset to specific types of objects. In this case, the preset can only be applied to points and shapes - in other words, nodes and closed ways. If you try to apply this preset to a line, it won’t work. Let’s look at the next line: When you click on the menu and open the sample form, at the top you see the text “Building Form.” This is the text defined in this line. This defines a <label> element, which simply displays text in the form. The text is defined by the attribute text=”some text”. Go down a few lines and find this: This is one of the tags that will be applied to the object we have selected. Because it uses the element <key>, the OSM tag given here will be automatically applied when the preset is chosen. Hence this object will automatically obtain the tag building=yes. The next line is a bit different, using the <text> element. The <text> element creates a blank field. When the form is created in JOSM, the user will be able to fill in the empty field. Because the attribute delete_if_empty=”true” is set, no tag will be added if the user leaves this field empty. The dropdown box on the form is defined in the following line: A dropdown box is defined by the <combo> element. As with the <text> element, the attribute key defines the tag key. The value is then chosen from a list of possible values. The display_values attribute allows you to choose different names to be displayed in the dropdown box, which may be easier to understand than the OSM tag values. Lastly, let’s look at the line which defines the checkbox. The <check> element defines - you guessed it! - the checkbox. The attribute default=”off” states that the box will be unchecked by default. The remaining attributes you have already seen. Creating Your Own Presets FileThe best way to create your own presets file is to take one that already exists, and manipulate it fulfill your objectives. Feel free to edit this sample file and experiment with it to learn the basics. Just remember that each time you save it, you will need to restart JOSM to load the changes. Before you start creating your own presets, you need to think carefully about the tags that you will use. Inventing new tags is another topic altogether. Generally, you should utilize existing OSM tags when they exist. Most existing tags are listed on the Map Features page on the OSM Wiki. This sample file contains most of the elements that you will find in a JOSM presets file - there aren’t very many form elements. If you’d like to experiment with a more complex presets file, download the dhaka_presets.xml file here. Additionally, a detailed explanation of all possible elements can be found here. Good luck!
Was this chapter helpful?
Let us know and help us improve the guides!
|