|
|
Imagery Offset
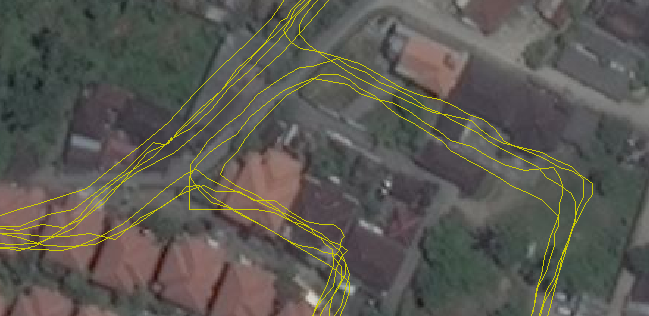
Imagery providers usually do a pretty good job of georeferencing their imagery, but occasionally the images can be out of position. This is particularly true in hilly or mountainous areas, where it can be difficult to stretch a flat image over an area of the Earth with many contours. When you load imagery in JOSM, it can sometimes be ten meters or more from its true position. This is called imagery offset. Notice in the following image that two separate aerial photographs have been georeferenced and merged together. Because georeferencing is not a perfect process, the images do not line up perfectly with each other. Hence one, or both, must be inaccurate.
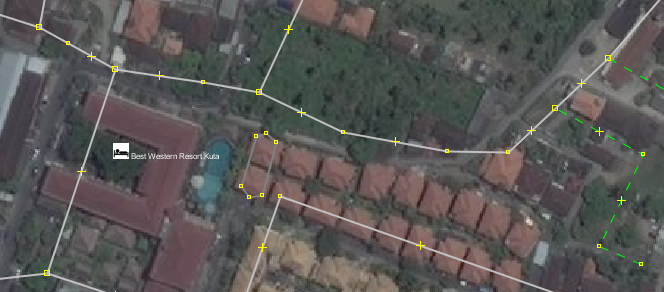
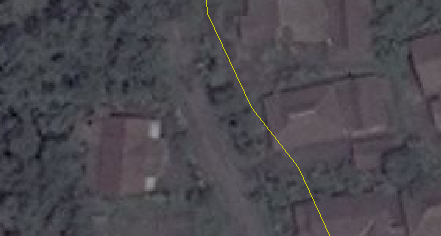
We’ve learned about two major ways of making maps - one is by utilizing aerial imagery to identify features on the ground, and another is by using GPS to record tracks and waypoints and then add them to OpenStreetMap. The advantage of aerial imagery is obvious. It enables you, the mapper, to see the whole picture, to observe various details from the image, consider your knowledge of the area, and easily trace roads, buildings, and areas. One key advantage of GPS however, is that it doesn’t suffer from offset like imagery. A GPS will always provide you with a correct latitude and longitude. The only exception is when the satellite signals are interrupted by tall buildings or mountains, but in this case it is easy to recognize the error. Observe the GPS trace in this image, compared with the Bing aerial imagery layer beneath it:
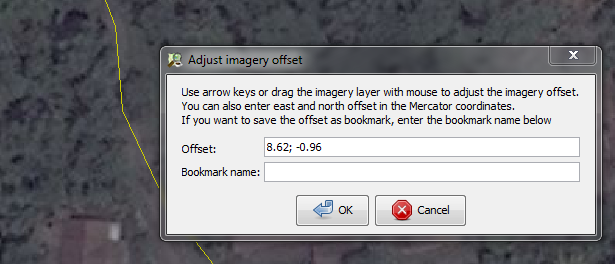
Because of what we now know, it is clear that the GPS trace is likely to be accurate, and the image beneath it is out of place. So now we must ask, “if the imagery may be out of place, how can we still use it and make accurate maps?” Correcting Imagery OffsetThe answer to the preceding question is that we can move the imagery so that it aligns with things that we know are in the correct location, such as GPS tracks. It is easy to correct imagery offset in JOSM. The best references for adjusting imagery are GPS tracks that follow roads. And the more GPS tracks that you have to reference, the more accurate you will be able to align your imagery. Since OpenStreetMap users often upload their GPS tracks to the OSM database, we can download them and use them to align our imagery.
What if there are no GPS tracks on OpenStreetMap, and you don’t have a GPS? Without GPS tracks, it is difficult to align imagery. If it is a relatively empty area (not much mapping done), you might choose to simply use the imagery as it is and correct the data later. It’s better to have map an area 20 or 30 meters offset than to not map at all. If you can positively identify the latitude and longitude of one object on the ground, you can ensure the imagery is correctly placed by following these steps:
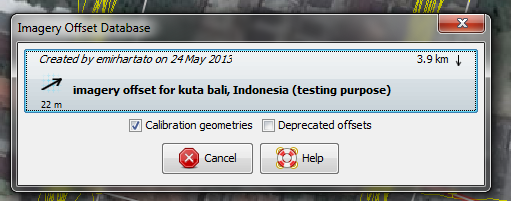
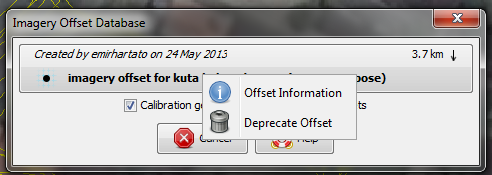
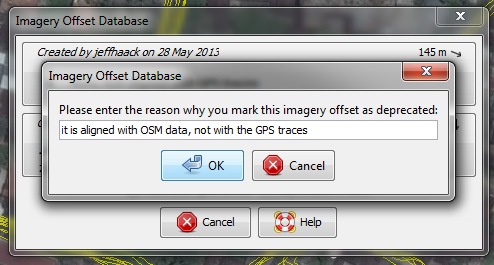
If, on the other hand, the area has already been extensively mapped, then hopefully the previous mappers have drawn objects in their correct locations. In this case, you can align the imagery to the OSM map, but beware! Other mappers may not be aware of imagery offset, and they may have made mistakes when they mapped. The Imagery Offset DatabaseNow you know how to watch out for and correct imagery offset, but there is one major problem with this approach that we have overlooked thus far. If every OpenStreetMap user adjusts the imagery differently, everybody will be mapping with slightly different backgrounds. Imagine that you are mapping a small town, and you realize that Bing imagery is offset by 15 meters to the north. So you adjust the imagery and then use it to map the whole town accurately. But then somebody else wants to add something to the map, so they download the data and load Bing imagery, but they don’t know about the imagery offset you discovered! They will think that something is wrong and all of the objects in town are misplaced by 15 meters, and they will start to move them, which is not correct! This can be disastrous for the town’s map data. For this reason it is important that all users are aware of imagery offset, and should always check for it before mapping an area. To help with this problem, some smart people created a plugin that allows users to save offset information in a database and share it with others. Let’s see how this works:
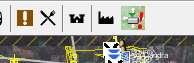
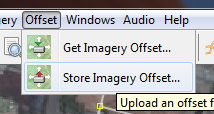
In the same way that you are able to save offsets as bookmarks, this plugin allows you to save offsets to a central database, and to access the offsets that other users have created. Hence, if one mapper creates an imagery offset in an area, other users can use the exact same offset to map with. When using aerial imagery layers, you should ALWAYS check for existing offsets, and when you create your own offset, you should ALWAYS save it to this database. Add Imagery Offset from the DatabaseWhen you add an imagery layer, the new plugin will alert you that you should check the imagery database for an existing offset. You will see an icon with a red exclamation point on it at the top of JOSM, like this:
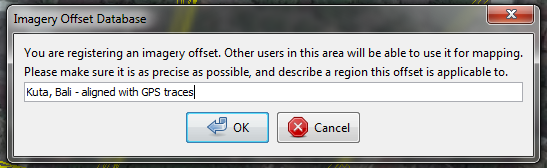
Add Imagery Offset to the DatabaseNow that we have marked this user’s offset as “deprecated,” we should add an improved offset to the database.
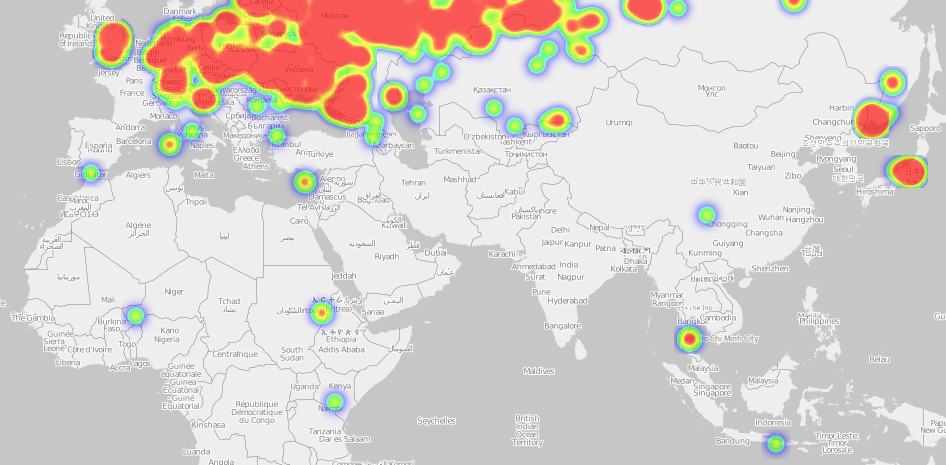
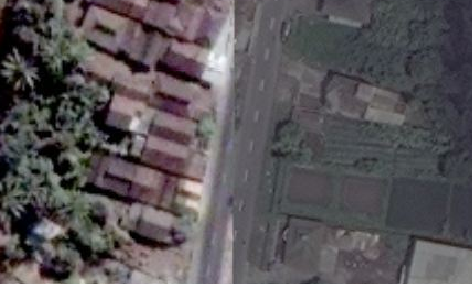
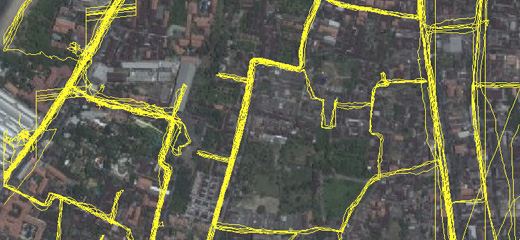
Oh No! Somebody mapped this area with misaligned imagery, so the area is not correctly mapped. This will take some time to fix. Imagery Offset Database WebsiteLastly, for more information on the offset database, you can visit the website at http://offsets.textual.ru/. This lists all the offsets that have been uploaded to the database, and it also has a cool map feature that visualizes where the offsets are located, as you can see here:
SummaryWhen you are just beginning OpenStreetMap, you don’t need to worry too much about imagery offset. But if you see another mapper’s edits that seem misaligned from the imagery, you should always consider that there may be an offset before you start changing their objects. And if you aren’t quite ready to deal with offsets yet, just remember that it’s better to map an area 20 or 30 meters offset than to not map it at all. But when possible, do remember that imagery offset may occur, and use the steps in this chapter to correct it when needed.
Was this chapter helpful?
Let us know and help us improve the guides!
|

 near the top of the Download window. Select your area and click “Download.”
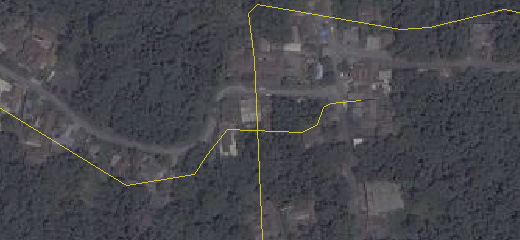
 at the top of JOSM.