|
|
Using Geofabrik and HOT Export
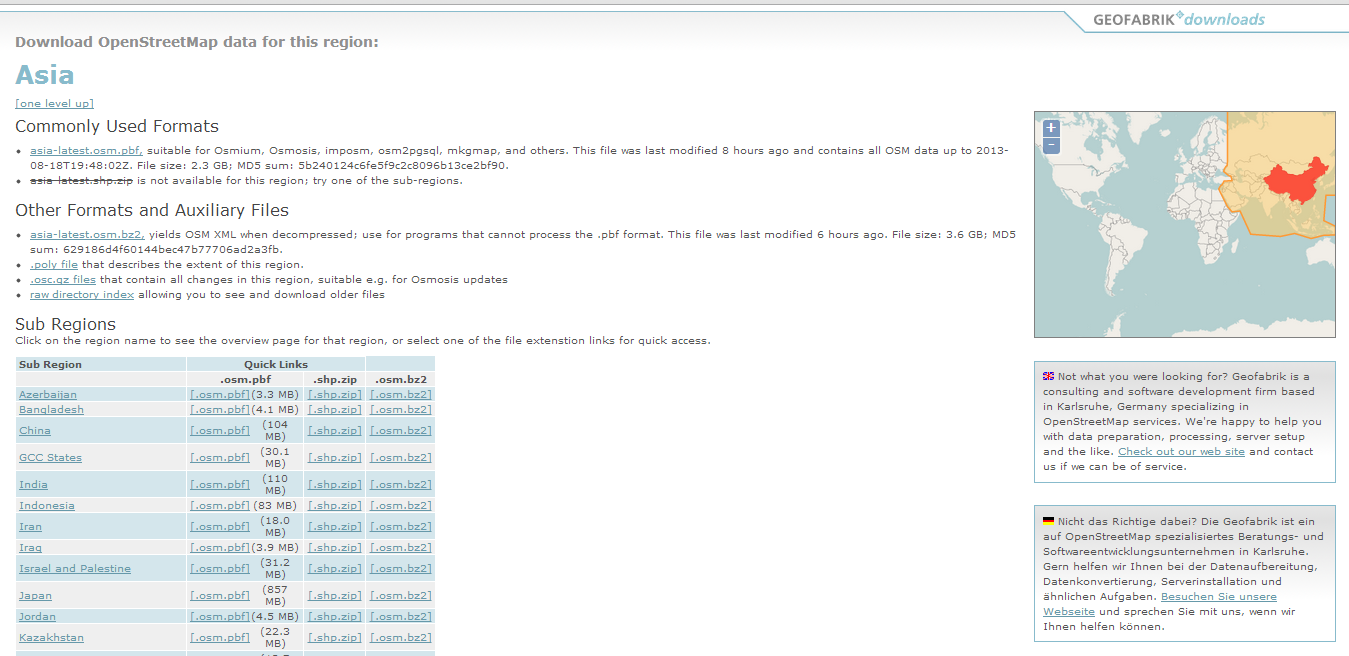
After learning how to add and edit data in OpenStreetMap (OSM), now maybe you would like to obtain the data as a backup or to process it using Geographic Information System software that is Open Source, such as Quantum GIS (www.qgis.org). Getting OSM Data on Geofabrik WebsiteThe OSM data can be obtained easily by downloading it from http://download.geofabrik.de/openstreetmap/
The data is divided into several regions. Indonesia can be found as part of Asia by clicking on the Asia sub-region on the blue table, and then the page will appear like this.
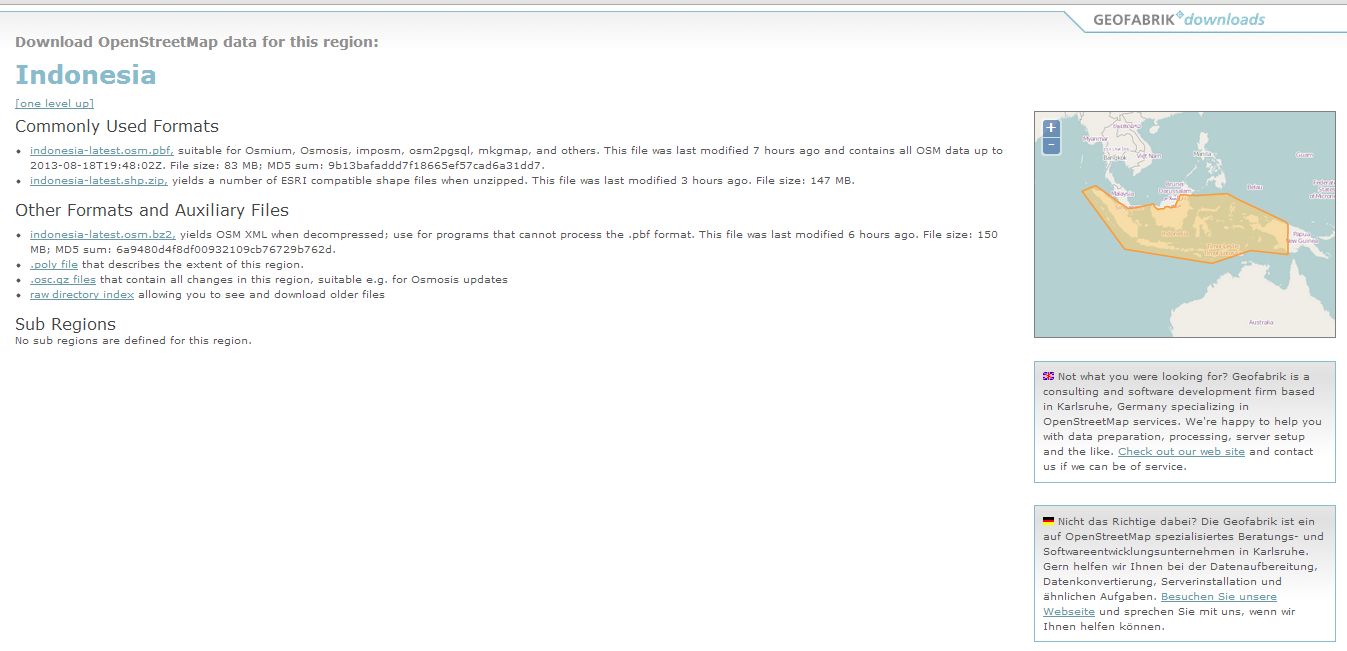
After appearing at the top of the page, see how the sub-region divides into countries of Asia. To get the data, you need to click the Indonesian state on the blue table, and it will appear like this.
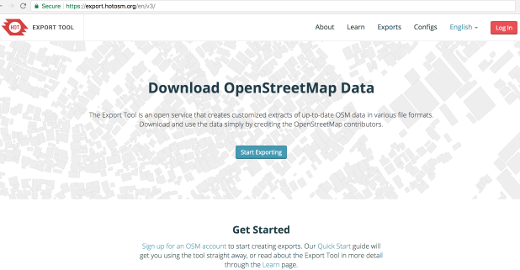
Then if you want to obtain the Indonesian data in shapefile (.shp) format, you click on the indonesia-latest.shp.zip link, and the file will be downloaded. There are several formats that can be downloaded. One popular format is shapefile (shp) with points, polyline, and polygon layer. You can check the last time data was updated. Please note, the server usually updates the data once every 24 hours, so if you just upload data to OSM, the data does not appear automatically when you download it, but you have to wait for the latest updates from the server. Getting OSM Data on HOT Export Tool WebsiteThe Humanitarian OpenStreetMap Team (HOT) has created an online service that allows users to create custom OSM extracts anywhere in the world, by selecting an area of interest, map features and file formats. Within minutes, up-to-date OSM data is exported, filtered and converted. The following section will guide you on how to use the Export Tool. This information can also be found through the ‘Learn’ section at export.hotosm.org.
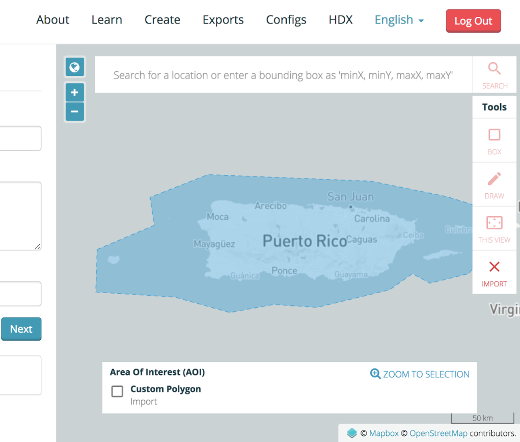
QuickStartAnyone can create a custom OpenStreetMap export with the Export Tool - just register an account. You can register with an OpenStreetMap account from openstreetmap.org, and a valid email address, which will be used to send a link to your export once it is complete. Identify Area of InterestThere are multiple ways an Area of Interest (AOI) can be selected through the Export Tool. This includes the ability to type and search, specify the coordinates of a bounding box, draw a bounding box, free draw a polygon, use the current view or upload a geojson file.
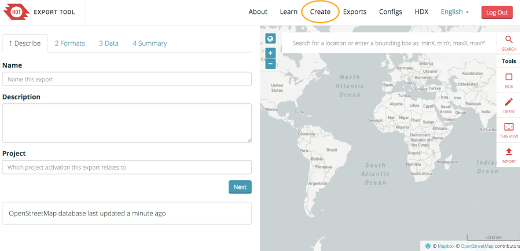
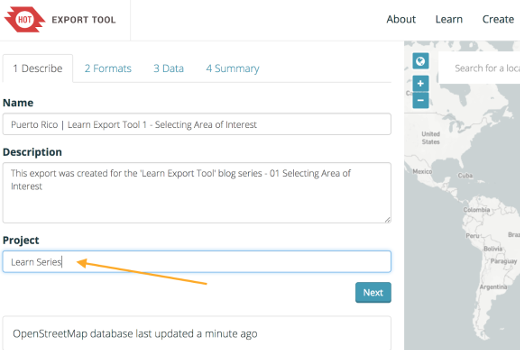
Once you are ‘Logged In’ to the HOT Export Tool, the ‘Create’ tab will become available. The ‘Create’ tab is where you will set up your export, by describing it on the left hand side and selecting your AOI with the map on the right hand side.
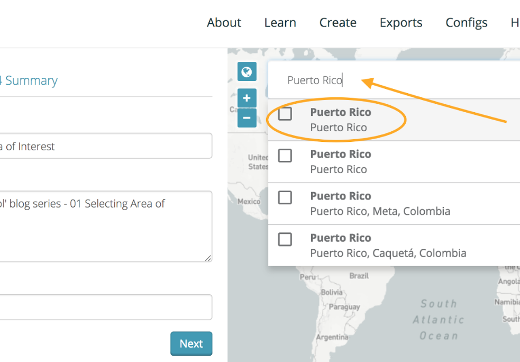
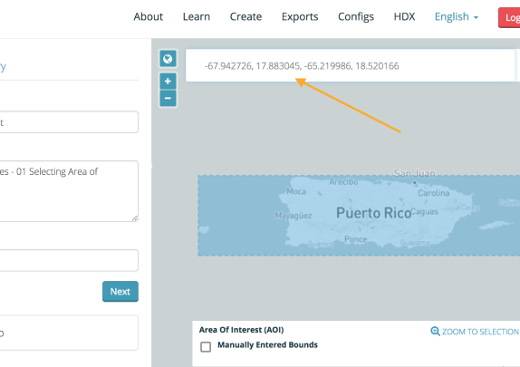
Search BarThere are 6 ways to define an AOI for your export. The first and second use the search bar, which can either find a place by typing in its name and selecting it from the options below, or by defining the bounding box coordinates. The minimum X, minimum Y, maximum X and maximum Y (West, South, East, North) coordinates of a country can be found in a CSV list provided by the Humanitarian Data Exchange (HDX).
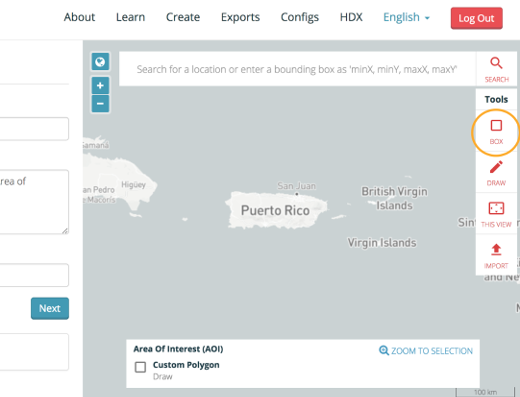
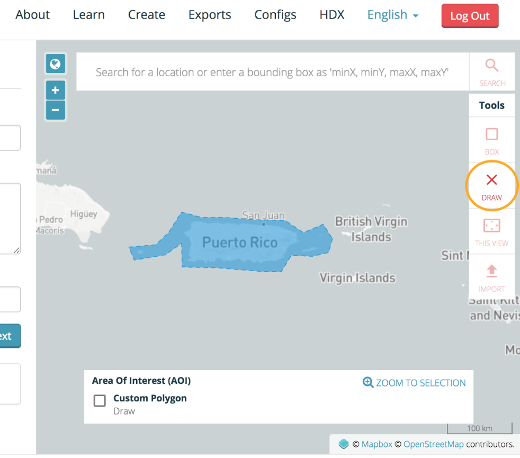
DigitiseThe third and fourth way that an AOI can be selected in the Export Tool, is by either drawing a bounding box by selecting the ‘Box’ option from the column of tools on the right of the screen. Or you can free draw a polygon directly on the map by selecting the ‘Draw’ tool.
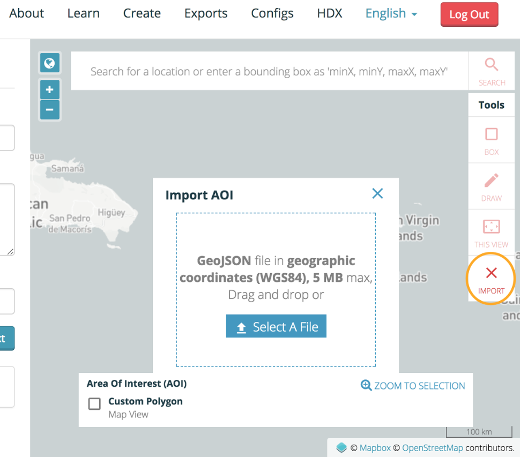
Upload PolygonThe last two ways in which an AOI can be selected is through the ‘This View’ tool on the right hand side of the map, which captures the extent of the map’s current view, or by the ‘Import’ tool which enables you to upload a polygon of the area.
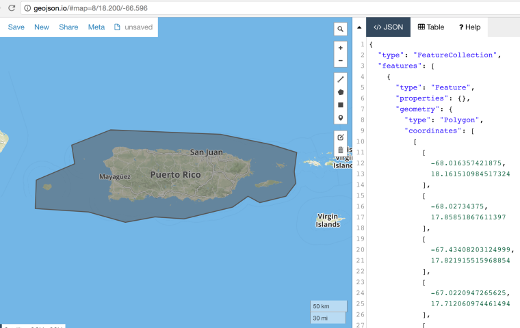
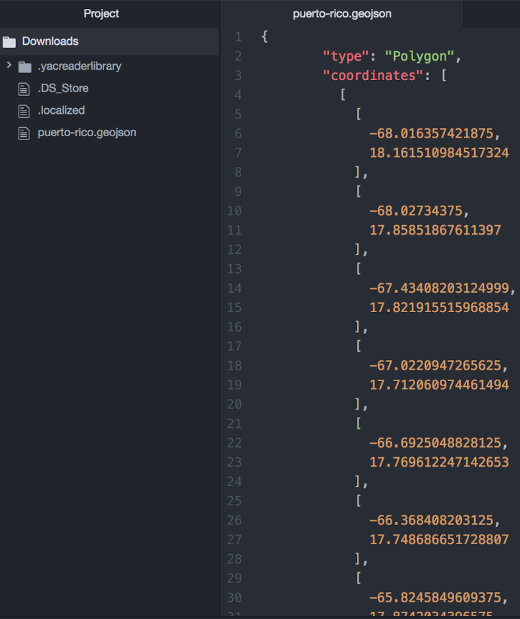
The imported polygon must be a GeoJSON file in WGS84 geographic coordinates. One of the ways to create a GeoJSON file is to use the geojson.io site. Once the area has been selected in geojson.io, copy the text in the box to the right, paste it into an editor of choice, such as Atom and save your GeoJSON file.
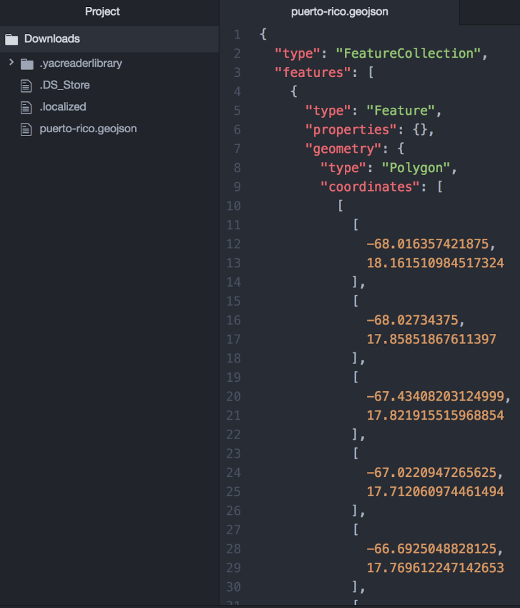
The GeoJSON file needs to be edited slightly in order for it to be accepted by the Export Tool. Please note that the file can not be multipolygons. In the simplest form the file only needs to state that it is a “type: Polygon” and list the coordinates of the points/nodes that identify the area. The GeoJSON file will then successfully be parsed by the tool and used to specify the AOI.
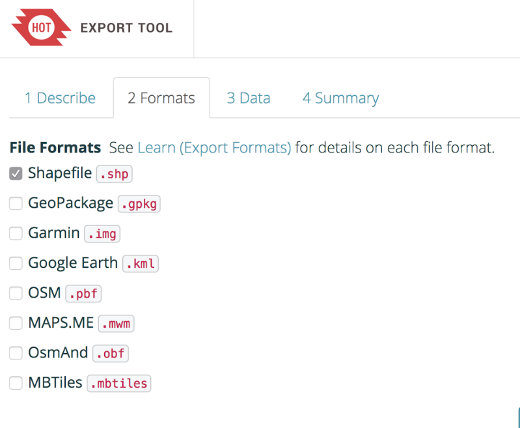
Select File FormatsThe tool allows OSM data to be extracted through the Overpass API in its native Protocol Buffer Binary (PBF) file format, before filtering the data for the map features and associated tags specified by the user. Once the data has been filtered it is then converted into the file formats chosen by the user. Currently the tool can convert OSM data into Shapefile .shp, GeoPackage .gpkg, Garmin .img, Google Earth .kml, OSM .pbf, MAPS.ME .mwm, OsmAnd .obf, and MBTiles .mbtiles. At least one of the file formats must be selected to create the export, but there is no restriction as to how many can be chosen, which can be done by ticking multiple boxes.
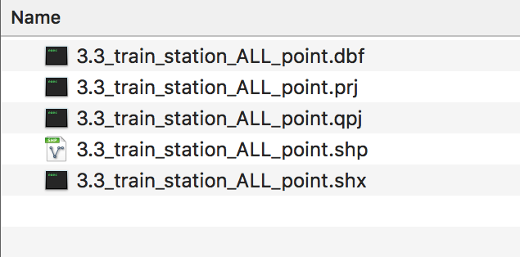
Shapefile .shpShapefiles are a tabular format developed by Esri. They are the most popular file format for GIS data. A shapefile is actually 3-4 individual files, commonly bundled together as a ZIP archive. Shapefiles do have certain limitations, such as the file size, capping at 2 gigabytes (GB) and a column name length limit of 10 characters. Read more about Shapefiles .shp in the Learn section.
Geopackage .gpkgOGC Geopackages store geospatial data in a single SQLite database. Geopackages are very similar to Spatialite-enabled SQLite databases. They should be usable in most major GIS applications. Geopackages support practically unlimited file sizes and numbers of columns in tables, and have full support for Unicode. They are especially ideal if you need to run SQL queries over the data. Read more about Geopackages.gpkg in the Learn section.
Garmin .imgA .IMG file contains all information needed to render a map onto a Garmin GPS mobile device. Please note that the cartographic .img style and feature choices of the map are not dependent on the feature selection submitted to the Export Tool - instead, a default style based on all OSM data is used. Read more about Garmin .img in the Learn section.
Google Earth .kmlThe Keyhole Markup Language (KML) is an XML-based format for modeling points, lines, polygons and associated attributes geographically. Google Earth is the most widely known earth view browsing platform using KML, which is also the reason why it was developed. Read more about Google Earth .kml in the Learn section.
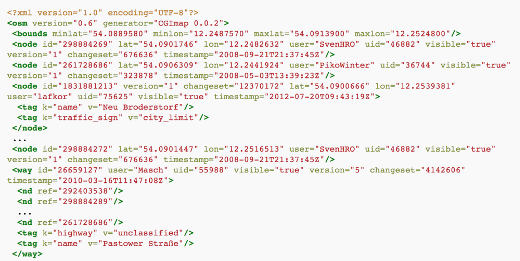
OSM .pbfThe canonical data format of OSM is an XML document of nodes, ways and relations. The Protocol Buffer Binary Format (PBF) is an optimised representation of OSM XML, which is smaller on disk and faster to read. This format is only compatible with OSM specific tools, such as OSM editing software. Each .PBF provided by the export tool should be referentially complete - that is, any node, way or relation referenced by a way or relation will appear in the PBF. Learn more about OSM .pbf in the Learn section.
MAPS.ME .mwmMaps.me is a GPS Navigation and map application for Android and iOS smartphones and tablets, notably supporting offline mapping and navigation. Read more about MAPS.ME .mwm in the Learn section. To use a custom export with Maps.me on Android, please follow these steps:
OsmAnd .obfOsmAnd is also a GPS Navigation and map application for Android and iOS smartphones, as well as tablets, notably supporting offline rendering, routing, and searching. Read more about the application and its numerous features of OsmAnd .obf from their main website.
MBTiles .mbtilesMBTiles is a file format for storing map tiles in a single file. The Export Tool allows users to create MBTiles containing tiles from OSM, which can be used as sources of offline context within applications that support them. Please note that MBTiles will extract all the OSM features in the selected area of interest through the Export Tool, with the ‘3 Data’ tab automatically switching to a dropdown source option and zoom range, in place of the standard tree tag and YAML feature selection option. Read more about MBTiles .mbtiles in the Learn section.
Additional file formats are continuously being suggested and added to the Export Tool. If there is a file format that you would like to see added in the future, please make a comment on the GitHub repository. For further detailed information regarding each file format type, please visit the ‘File Formats’ page in the ‘Learn’ section on the tool website. Customise Map FeaturesThe tool allows the user to customise the data selected within the defined area of interest. The OSM data is defined by using tag filters and key selections, with the Tag Tree or YAML Form. The Tag Tree is for common use cases, presenting a curated set of filters and selections, where the YAML configuration provides complete control over filters and selections, using a SQL-like filter definition.
OSM is an open global database of tagged geographic features, with three types of elements:
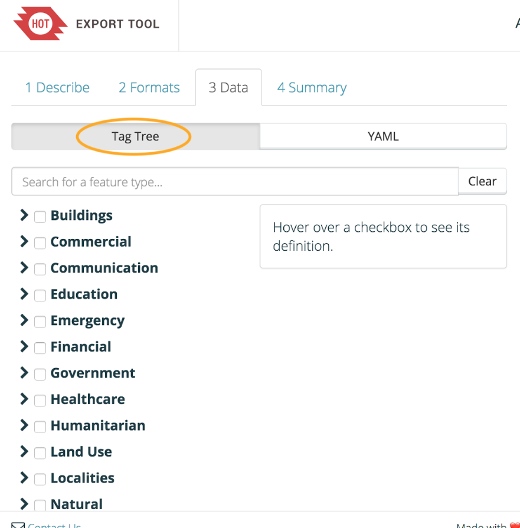
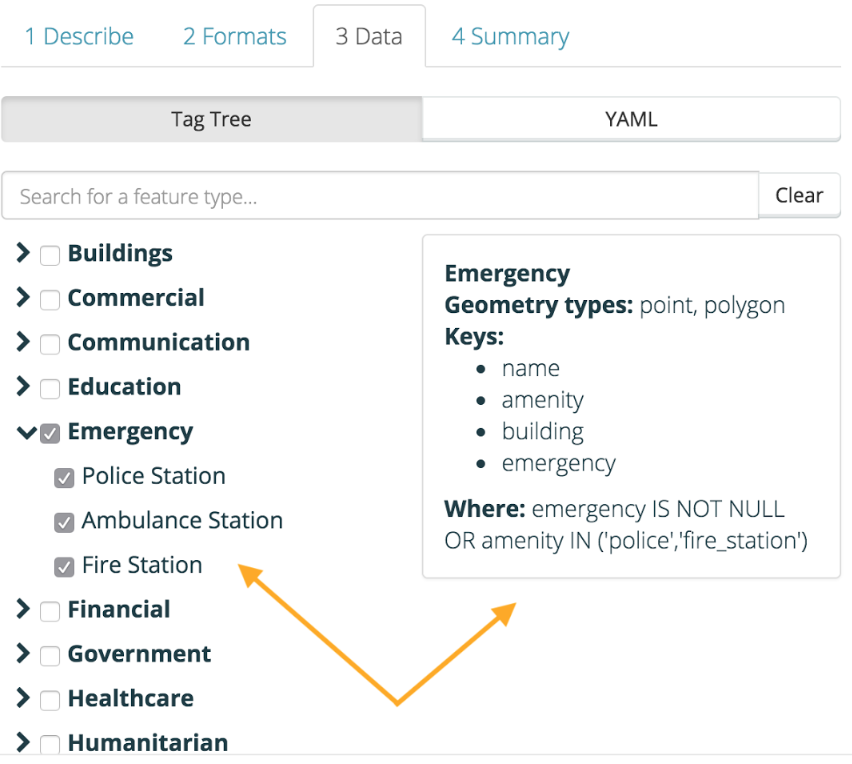
Each of these elements can have any number of key=value tags. For example, a post office may be represented by a way with the tags building=yes and amenity=post_office. Lets see how these tags can be defined in the Export Tool using the Tag Tree and YAML Form to filter OSM data. Tag TreeThe Tag Tree is the simplest way to get started selecting features, simply by ticking the desired parent or child checkboxes. Please note that selecting a parent checkbox will add additional key=value tags associated to the theme, as well as the child checkboxes below it. Each parent checkbox has a different query to filter data, so it is highly recommended that the syntax for each theme is explored by hovering over the checkbox, which will provide an info box to the right.
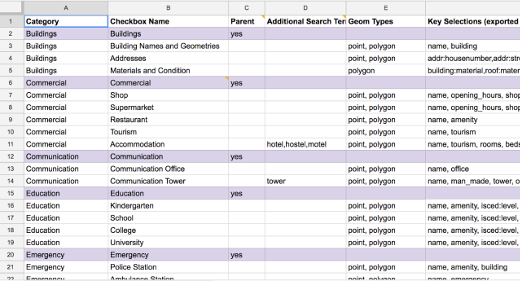
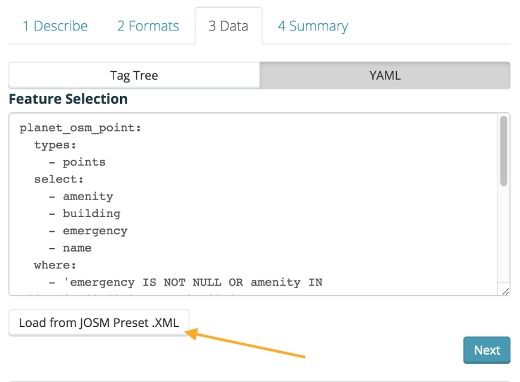
For example selecting the ‘Emergency’ parent checkbox, will automatically select the ‘Police Station’, ‘Ambulance Station’ and ‘Fire Station’ child checkboxes below it, yet in addition to this it will also select all tags where emergency=yes, amenity=police and amenity=fire_station in the following SQL query: emergency IS NOT NULL OR amenity IN (‘police’,’fire_station’) The parent checkboxes do not always represent what is available as children below, to try and account for all possible tags associated with a theme. OSM tags are continuously evolving and we want to ensure that the tool can adapt to these changes. Only the most commonly used key=value tags are represented as child checkboxes, and the parent checkboxes are used to try and encompass those not used as frequently, but fall within a theme. If you have suggestions for modifications to these themes and tags, please comment on the spreadsheet used to populate the Tag Tree, and we will try to incorporate it where appropriate.
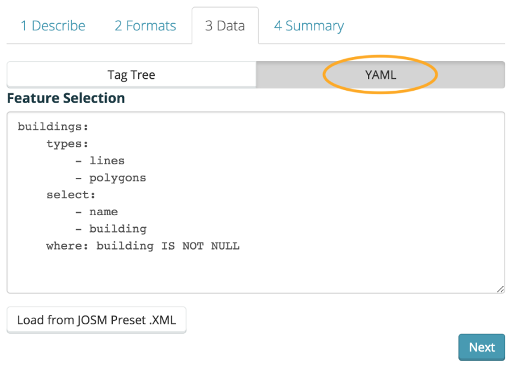
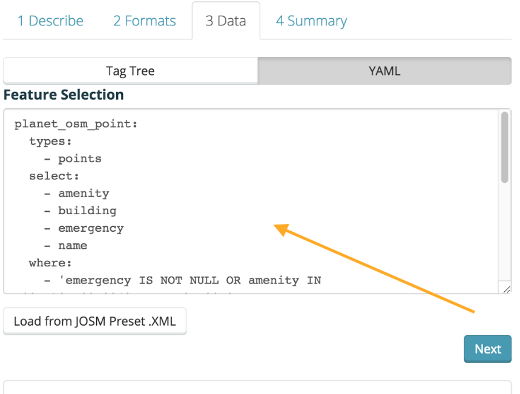
YAML FormUsing a YAML configuration provides complete control over applying filters to the OSM data, by using a SQL-like filter definition to apply key=value tags. Please note that the Tag Tree also generates syntax on the YAML Form, so any parent and child checkboxes selected will automatically be applied in the YAML box. This acts as a starting point for the query which can be further edited.
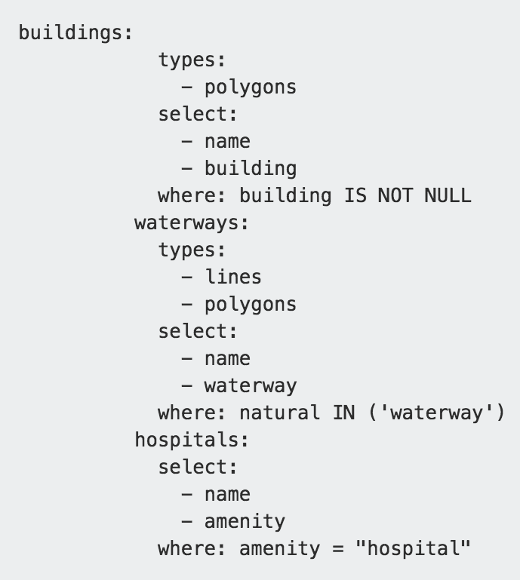
The use of YAML was chosen due to its simplicity and compatibility with SQL. The YAML feature selection format is similar to style files used by programs such as osm2pgsql and imposm. It is whitespace sensitive, with each child element indented below its parent element, and preceded by a dash. This dash must have a space after it. Here is a basic example of a feature selection with 3 themes, buildings, waterways and hospitals:
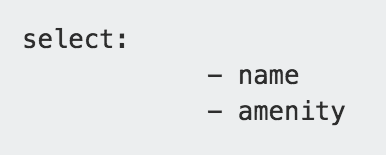
YAML has Themes and two data structures, Mapping and Lists. Theme in the above example is: buildings. Mappings in the above example are: types and select Lists in the above example are: child elements of select and types. YAML: ThemesThemes are the top level keys in the YAML document, with valid characters including letters, numbers and underscores. YAML: Geometry TypesThe list values under the mapping types can be one or more of ‘- points’, ‘- lines’, ‘- polygons’. If the types key is omitted, all three geometry types will be included in the theme. YAML: Column SelectionsList items under the mapping select key determines the columns for each theme. The following example will populate the ‘name’ and ‘amenity’ columns with their values from OSM:
YAML: FiltersFilters are under the where: key in each theme. They define what subset of OSM features belongs to that theme. The following example will filter the theme to only features where the key natural has the value waterway:
Please note it is almost always necessary to have some kind of filtering, otherwise the theme will simply include all OSM features for the given geometry types. A filter is specified using SQL-like syntax, with valid keywords IS NOT NULL, AND, OR, IN, =, !=.
JOSM PresetsOlder versions of the Export Tool used JOSM Preset .XML files to define feature selections. The new version uses YAML as it is more flexible in how it transforms OSM data. The new Export Tool, however can help convert JOSM presets into YAML configurations by selecting the ‘Load from JOSM Preset .XML’ button. Please note if the preset is more complex, it may need to be written as a new YAML configuration based on the ‘item’ elements contained in the XML.
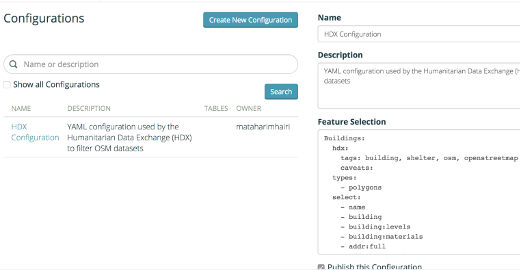
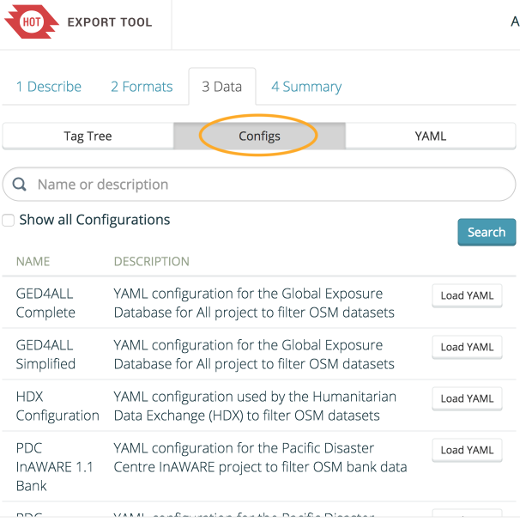
ConfigurationsYAML configurations can be defined and saved for future use through the ‘Configs’ page. It’s useful to create one configuration for a project, which can then used on all exports related to that project. Give the configuration a ‘name’ and ‘description’ that will make it discoverable by other users. Unchecking the ‘Public’ checkbox will make the configuration visible to only the user.
Please note that configurations can be edited, which is useful for evolving a feature selection during the course of a project. Saved YAML configurations can be selected via the ‘Stored Configuration’ option on the ‘3 Data’ tab when creating an export. Use the Search bar to find configurations related to your project.
For further detailed information regarding feature selections and YAML, please visit the ‘Selecting Features’ and ‘YAML Specification’ in the ‘Learn’ section on the tool website.
Was this chapter helpful?
Let us know and help us improve the guides!
|