|
|
VespucciVespucci is a free tool for editing OpenStreetMap data and known to work on a wide range of devices for example Smartphones, Tablets. It supports most operations available in desktop OSM editors. However, this app is only available for Android devices and works for all Android Versions since 4.0. You can download it from Google Play Store, Amazon or F-Droid. Release and beta APKs of the app are also available from its GitHub repository. Features
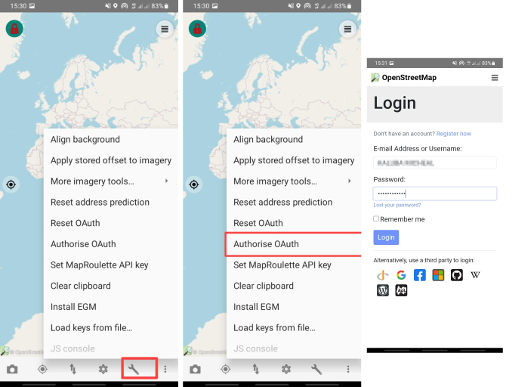
Mapping using VespucciOSM data in Vespucci are called objects. Points are called nodes, lines are called ways, and polygons are called closed ways. To add OSM data using Vespucci, you are required to sign in to your OpenStreetMap account. Sign in by tapping the “More options” icon (located on the lower right portion of the screen) and selecting “Authorise OAuth” under “Tools…”. Type your OSM username (or email address) and password, then tap “Login”. If you do not have an OSM account, select “Register now” instead.
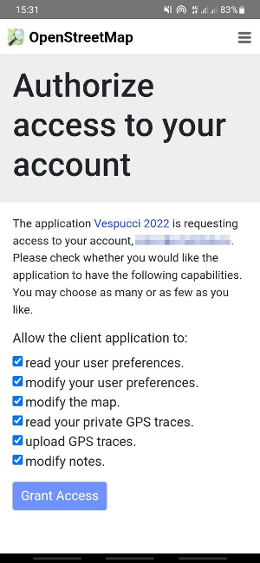
Vespucci will need access to your account. To authorize access to your account, tap “Grant Access” after logging in. Make sure all boxes are checked to maximize what you can do in Vespucci.
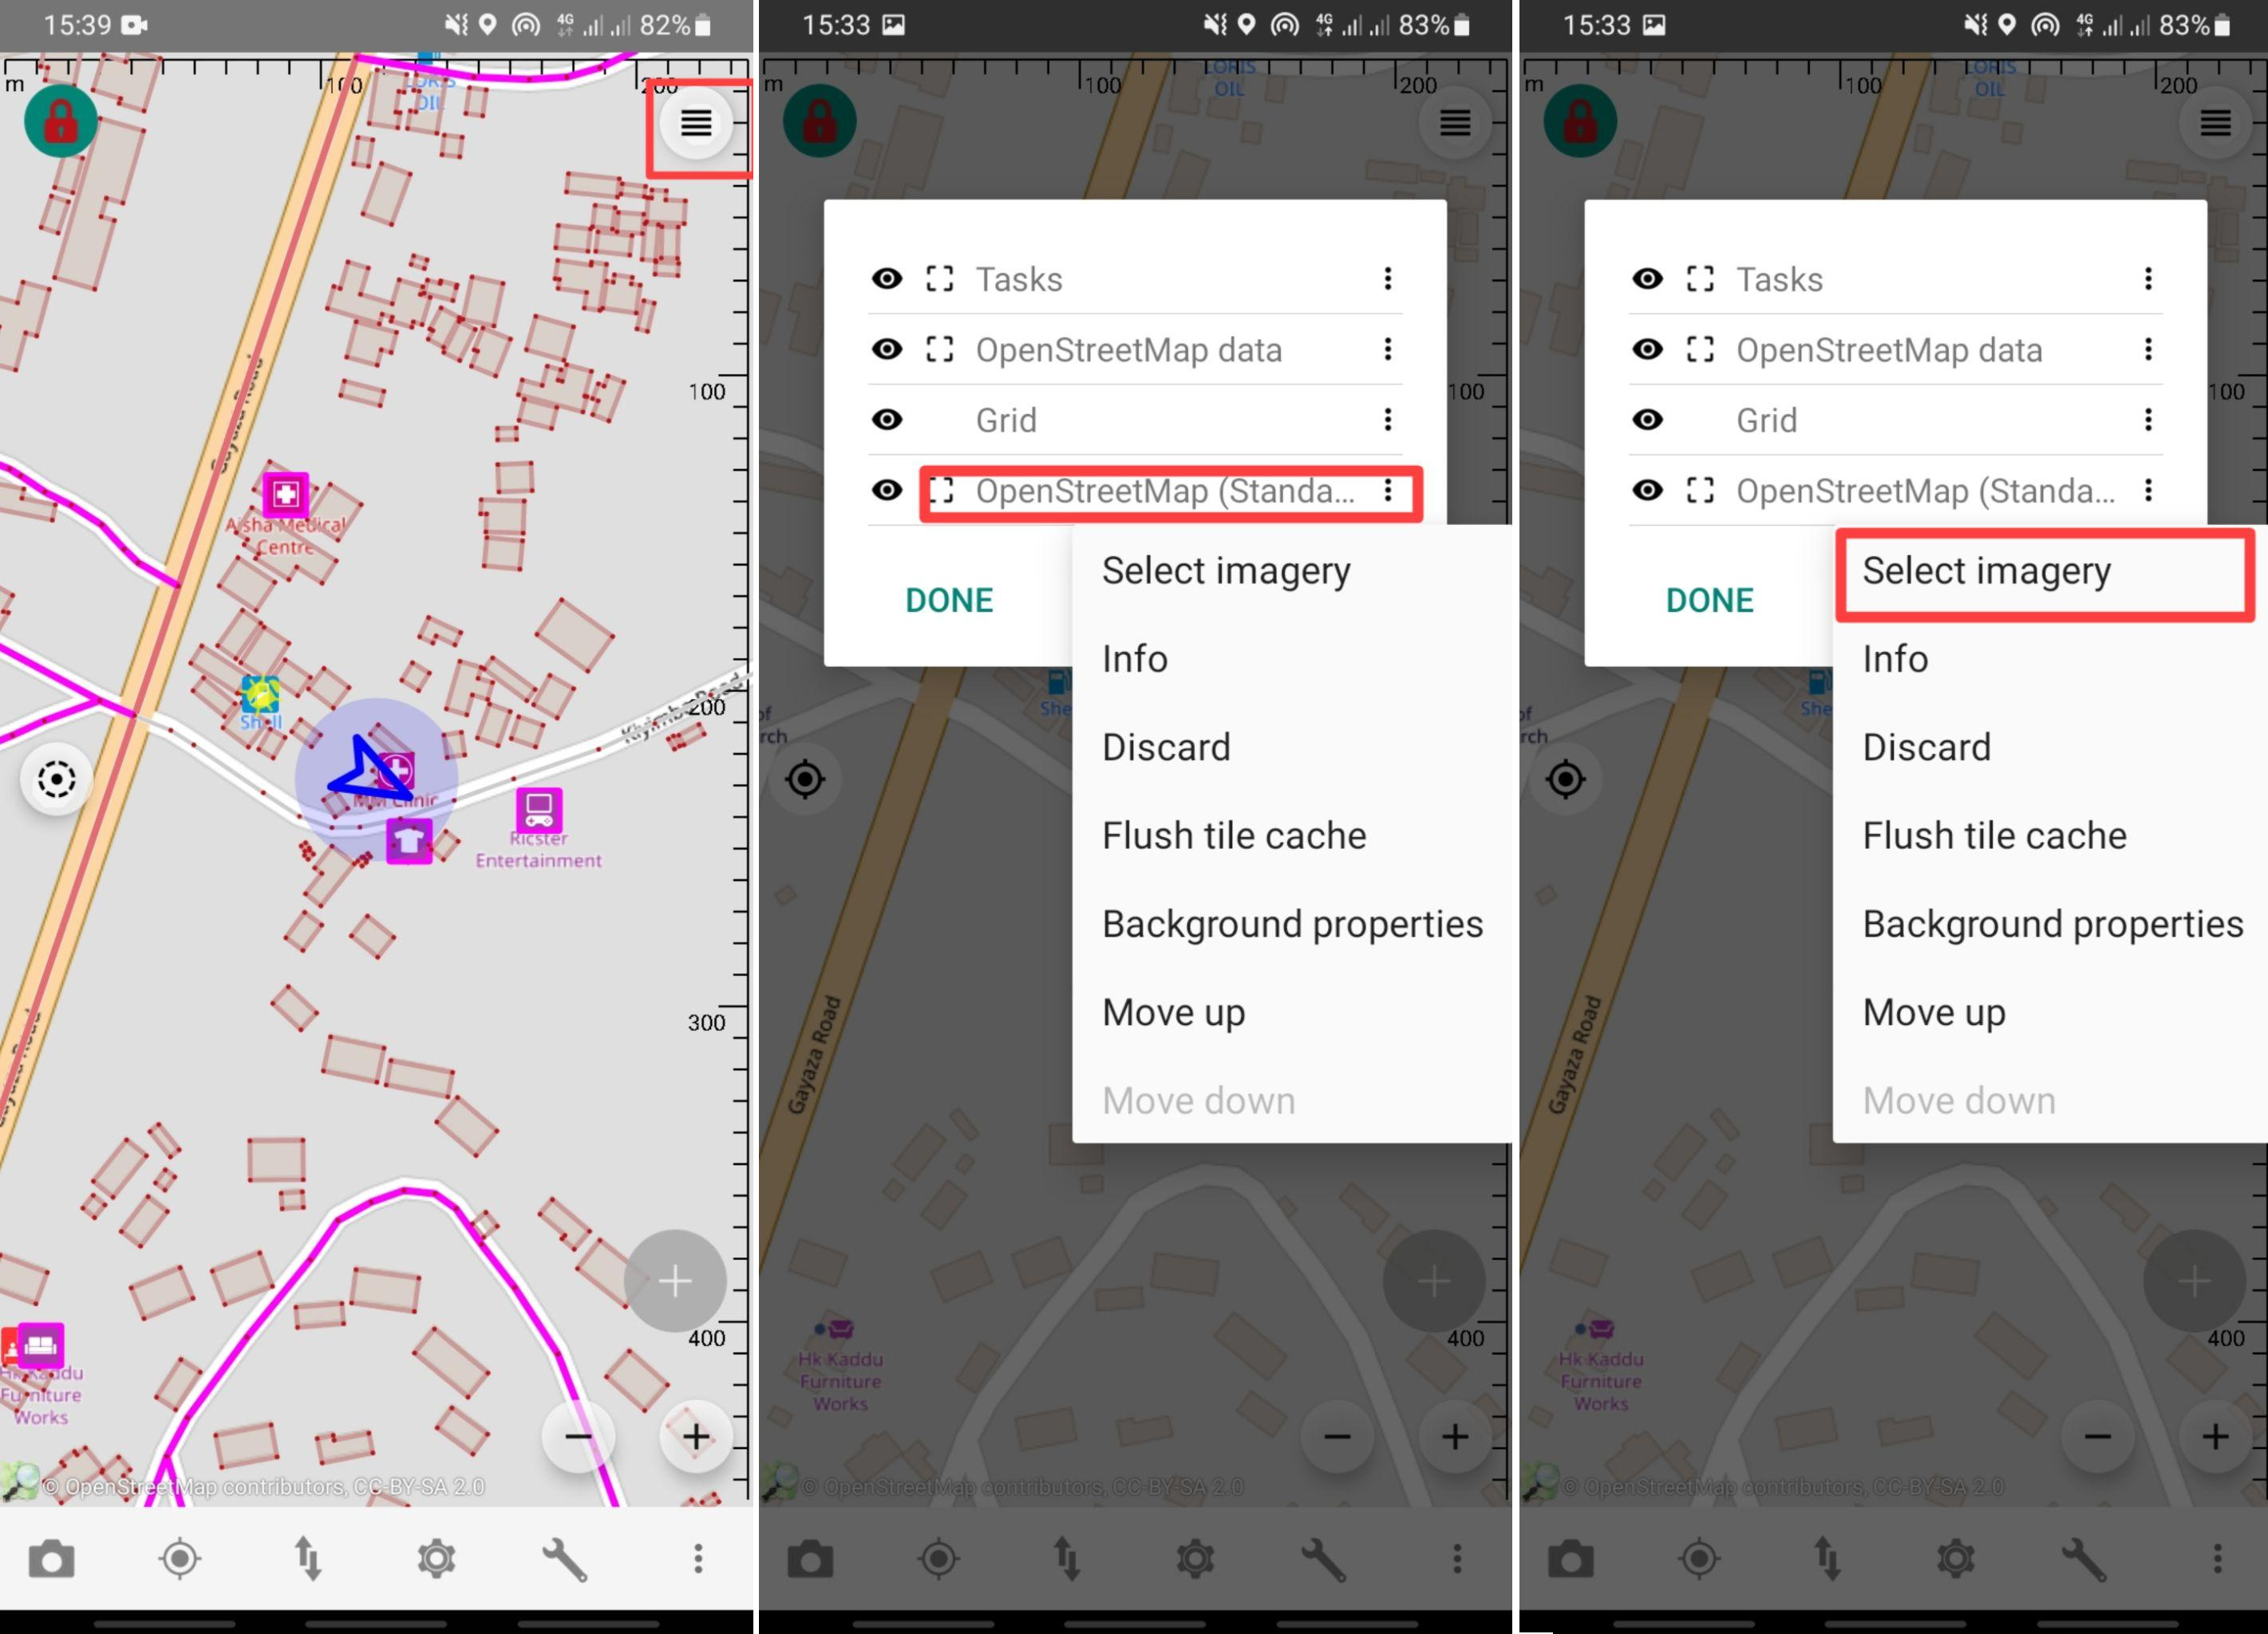
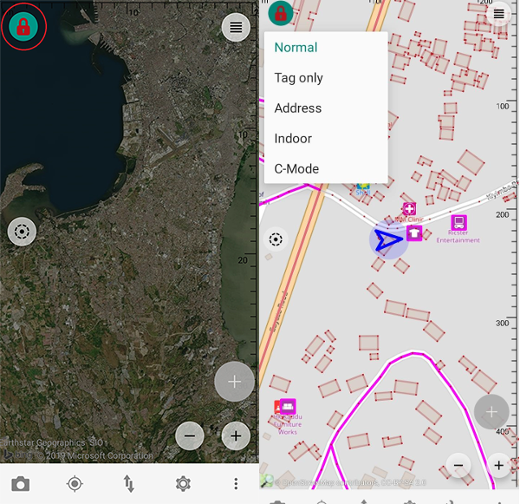
After signing in, locate your area of interest through the “GPS” icon or through “Find” under “More options”. Change the map background to your desired imagery by clicking on the three lines in the Top-right corner and clicking on “OpenStreetMap(Standard)” since it is the default Imagery and that will list all the available Imageries.
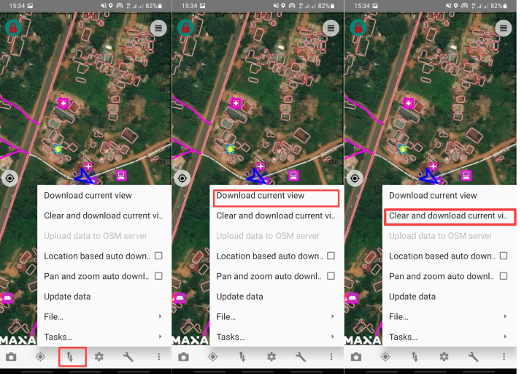
To edit offline, select “Download Current View” or “Clear and download current View” under the “Transfer” icon. This will allow you to download and edit the area shown within your screen with a saved background imagery of your choice. Editing offline will prevent you from editing OSM data at the same time with other mappers hence avoiding data quality issues that may have arisen.
Unlock the map so you can start adding data. Do this by tapping the lock icon on the upper left corner of the screen. Long press the unlock icon then tap Normal so you can add and edit nodes, ways, and tags. Selecting the “tag only” option will only allow you to edit tags.
Adding and editing tagsTo add or edit tags, tap on your desired object. A new set of icons will appear at the bottom of the screen. Tap the “Add preset” icon or the “Edit properties” icon to add or modify tags.
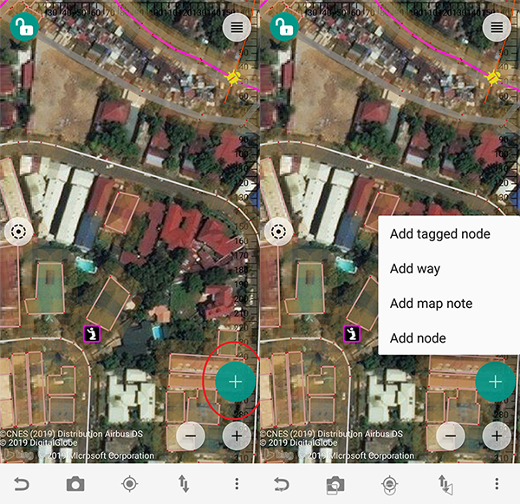
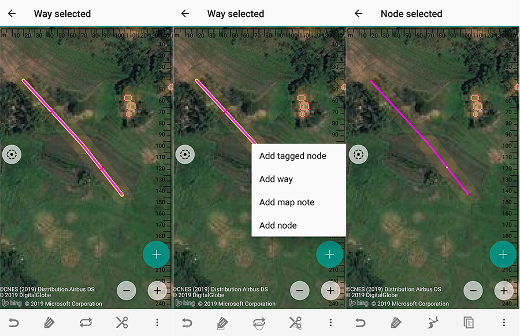
Adding/creating new objectsTo add a new object, tap the large green button on the lower right corner of the screen and select what you want to add. Zoom in and tap where you want to put the object.
To create a new node, choose add node and tap on the area where you want to put the node.
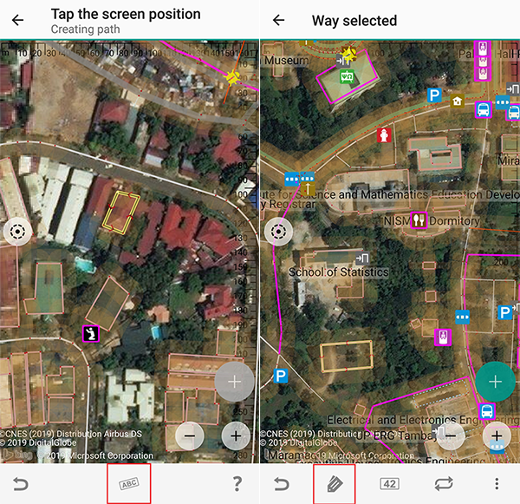
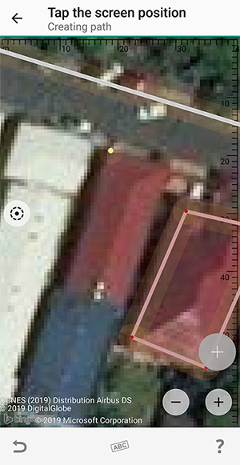
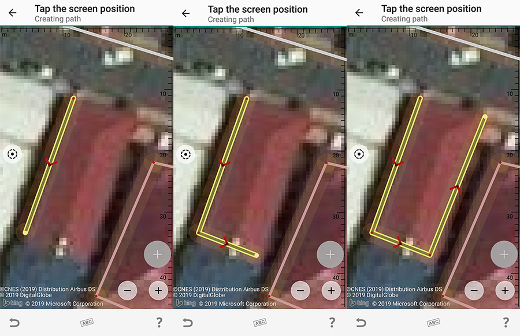
To create a way, choose add way and tap continuously on your screen until you get your desired result.
To create a closed way/polygon, create ways and simply tap on the first node of the first way you created to close the polygon. Tap the “Add preset” icon to add tags to your polygon. Untagged ways are fushia in color, while tagged ways are colored according to their tags/properties (i.e., tagged buildings are beige, tagged waterways are blue, etc.).
Adding a node to a waySelect the way where you want to add a node. Tap the large green button on the lower right corner of the screen and select add node. Tap where you want the new node to appear. A new node will be added in the selected location.
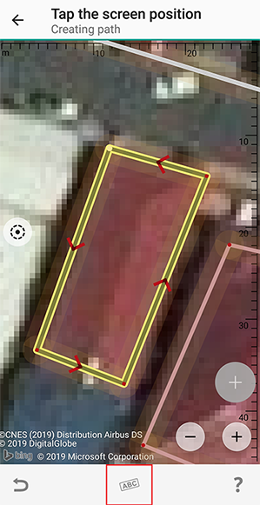
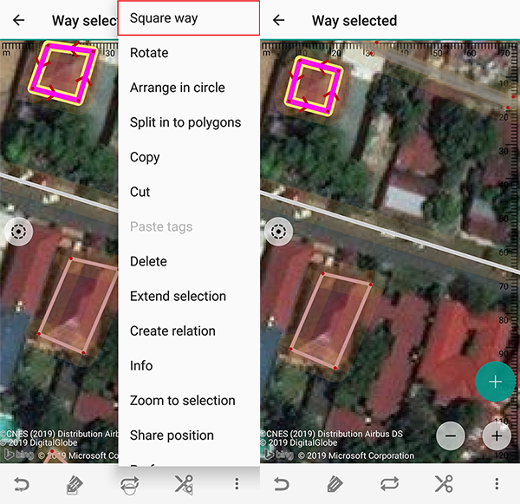
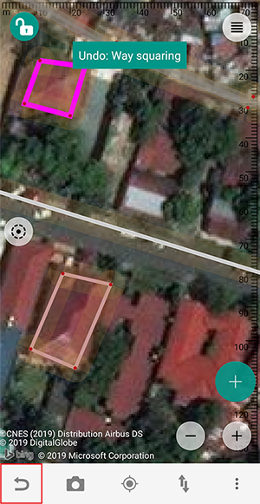
Editing and moving objectsTo move an object, tap it once and move it to your desired location. To square a polygon, select it then choose “square way” under the “More options” icon.
Undo/RedoTo revert your changes, tap the “Undo” icon on the lower left corner of the screen. Tapping it will reverse your most recent changes.
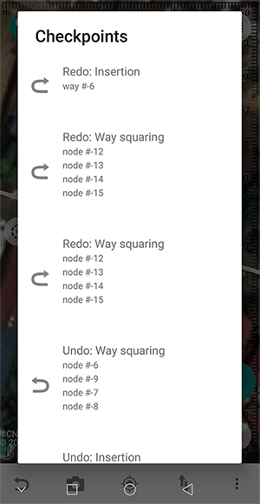
To redo, long press on the “Undo” icon. A list of operations you have undone will appear. Select what you want to redo.
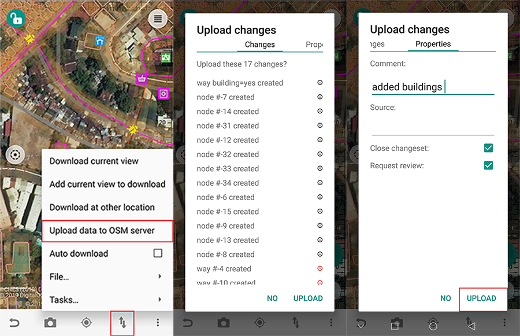
Uploading your changesTo upload your changes, tap the “Transfer” icon on the lower portion of the screen and select “Upload data to OSM server”. A list of your changes will appear. Tap “Properties” to input your changeset comments, then tap “Upload”. If the upload is successful, your changes will appear immediately in OSM.
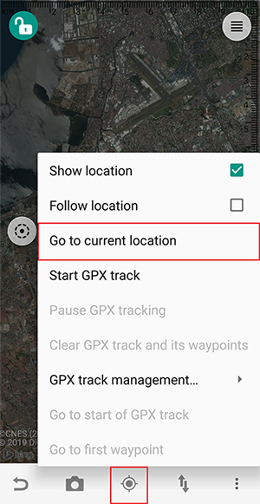
Uploading your changes to OpenSteetMap requires you to be connected to the internet and be logged in to your OSM account so make sure you have signed in before editing. Searching for placesTo locate your current location, tap the “GPS” icon on the lower portion of the screen and select “Go to current location”. The screen will automatically zoom to your location. Note that your device’s GPS should be on for this to work.
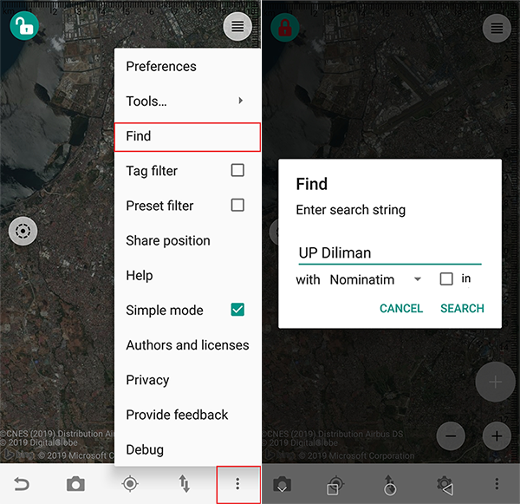
To locate for other locations, tap the “More options” icon and select Find. Type the name of your desired location and select search. Make sure that you are searching “with Nominatim” to perform a Nominatim search of places.
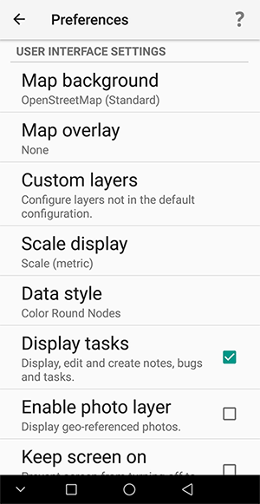
Other Vespucci settingsTo edit your map’s background properties, tap the “Preferences” icon on the lower portion of your screen. A user interface settings window will appear. Choose what you want to adjust from the list. You can also edit the user interface settings, data and edit settings, location and server settings, etc., under this option.
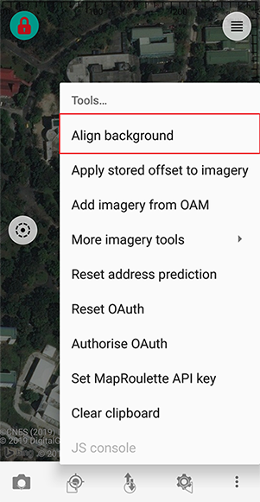
Some settings can be adjusted under the “More options” icon. To align the background layer of your map (if there is an offset), tap “Align background” under “Tools…”. Doing this requires network connectivity.
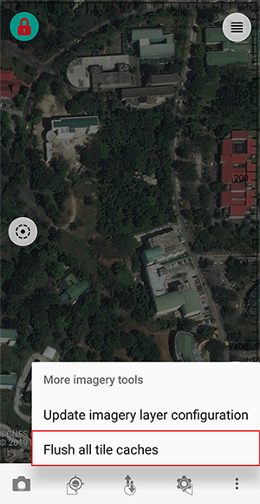
To clear your downloaded tile caches, select Tools > More Imagery Tools > Flush all tile caches. This will empty all on-device tile caches you have.
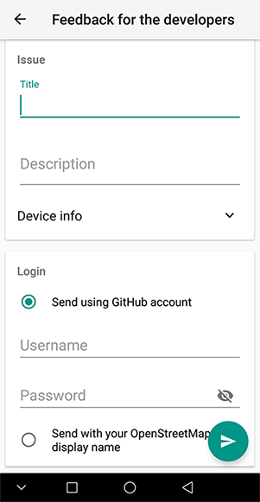
You can also provide feedback to Vespucci developers using your GitHub or OSM account under the “More options” icon.
Was this chapter helpful?
Let us know and help us improve the guides!
|